

I came across this planked panel piece on Pottery Barn's website. It's almost exactly what I would want! I knew it the second I saw it! But their's has the US white washed onto it and it's 4 separate pieces and oh did I mention only $350! Ha! Not in my budget! But it got my mind racing! I asked John what he thought about hitting up Home Depot and buying some stuff to make this as one large piece with no US outline on it.

|
| Pottery Barn Planked USA Panels |
I did a search on Pinterest and google for a how to, and came up empty handed! We were on our own here! Great! But we pressed on and made it work! We ended up spending $26 to make ours, and luckily enough we had a store credit at Home Depot of just over $26! WAHOO!

I posted a photo of the wood fencing pickets we used to make the planks on Instagram asking what people thought we were going to make. You guys came up with some interesting options! Now you can finally see what we did and how we did it.
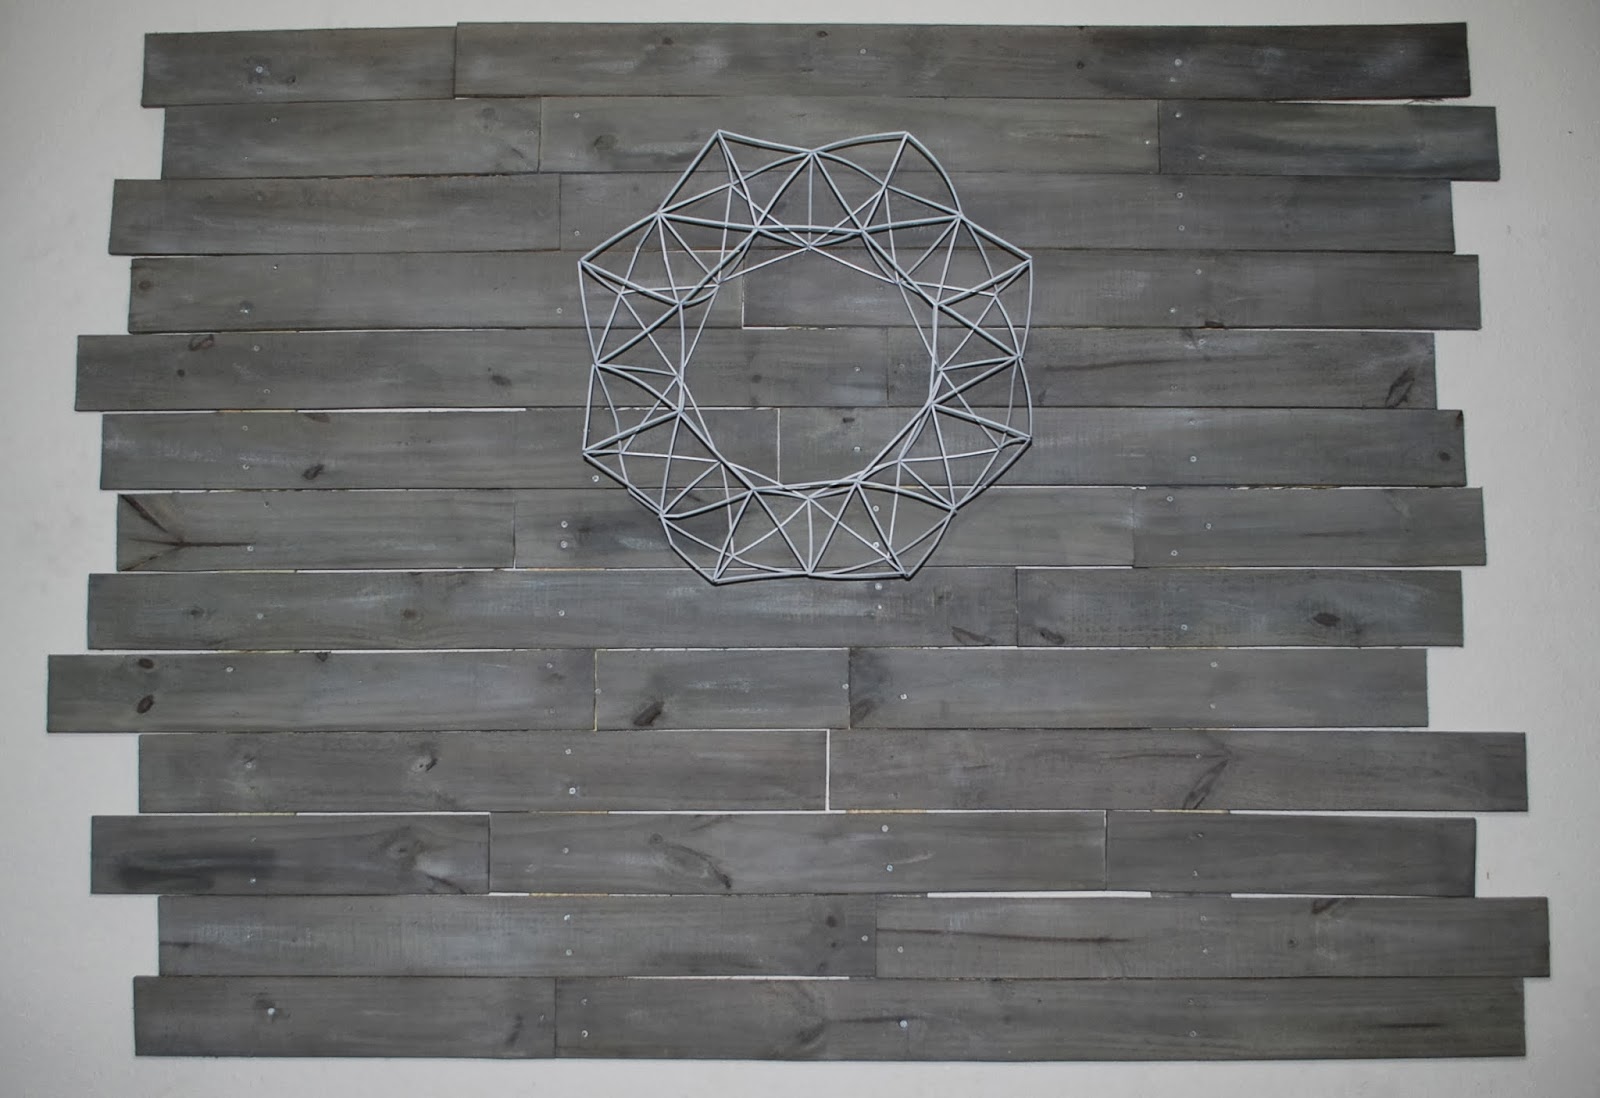
First we measured behind the couch for spacing and determined how big we wanted our piece. Then I moved the wood around on the floor and marked where I wanted the wood placed, and where I wanted it cut once it was all attached. We labeled each piece by the row it would go in and location.
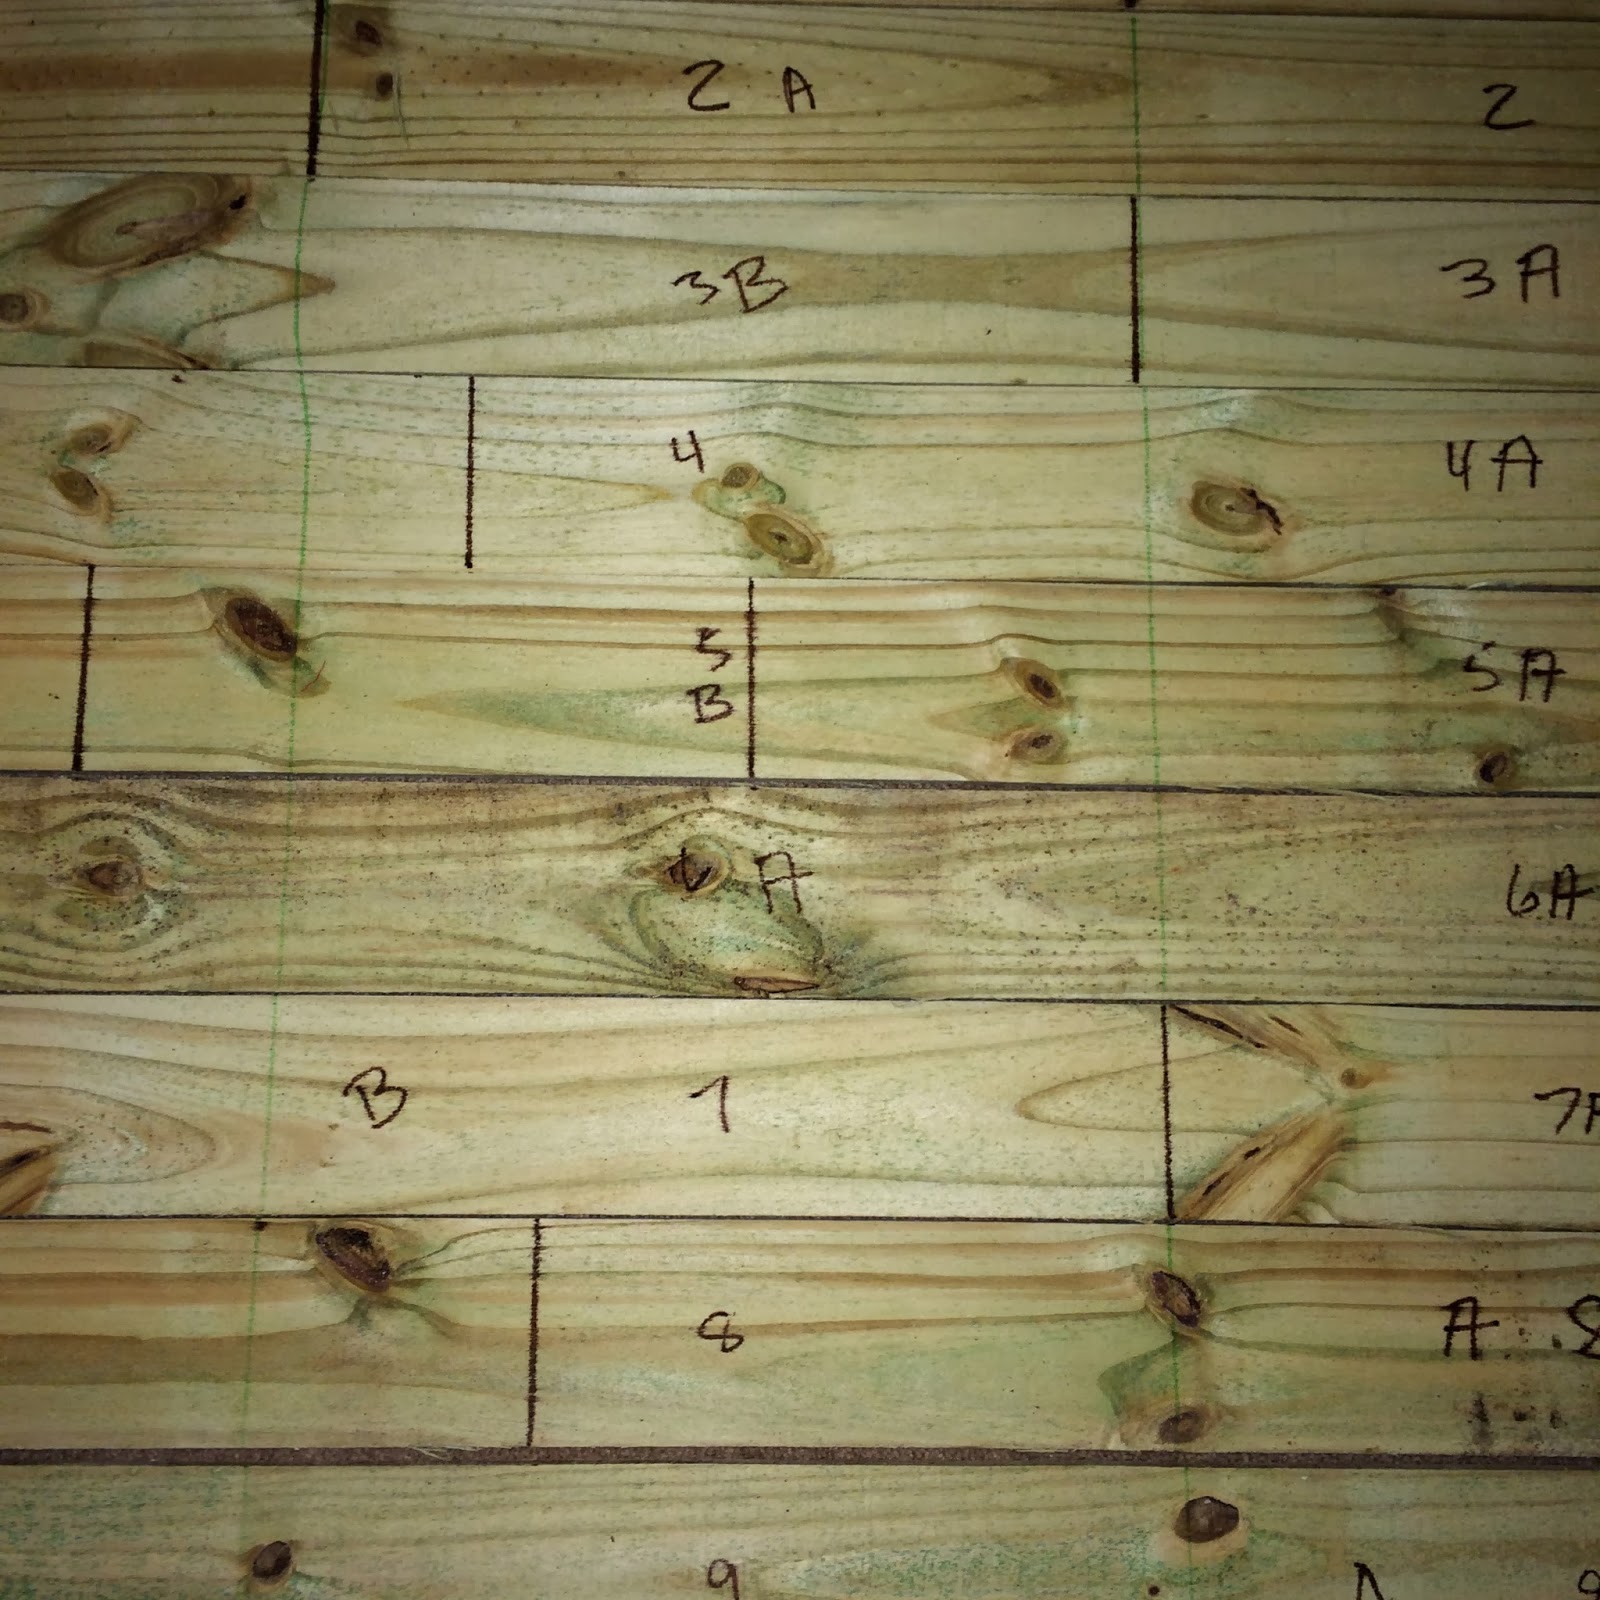
John then laid out 4 pieces of wood vertically. We then placed some wood in between each vertical piece. The smaller horizontal wood helped keep the spacing while we built the piece and allowed the vertical pieces to line up to the studs on our living room wall. That took some coordinating in knowing where we wanted to hang the piece and where the studs in the living room were and building with that in mind.
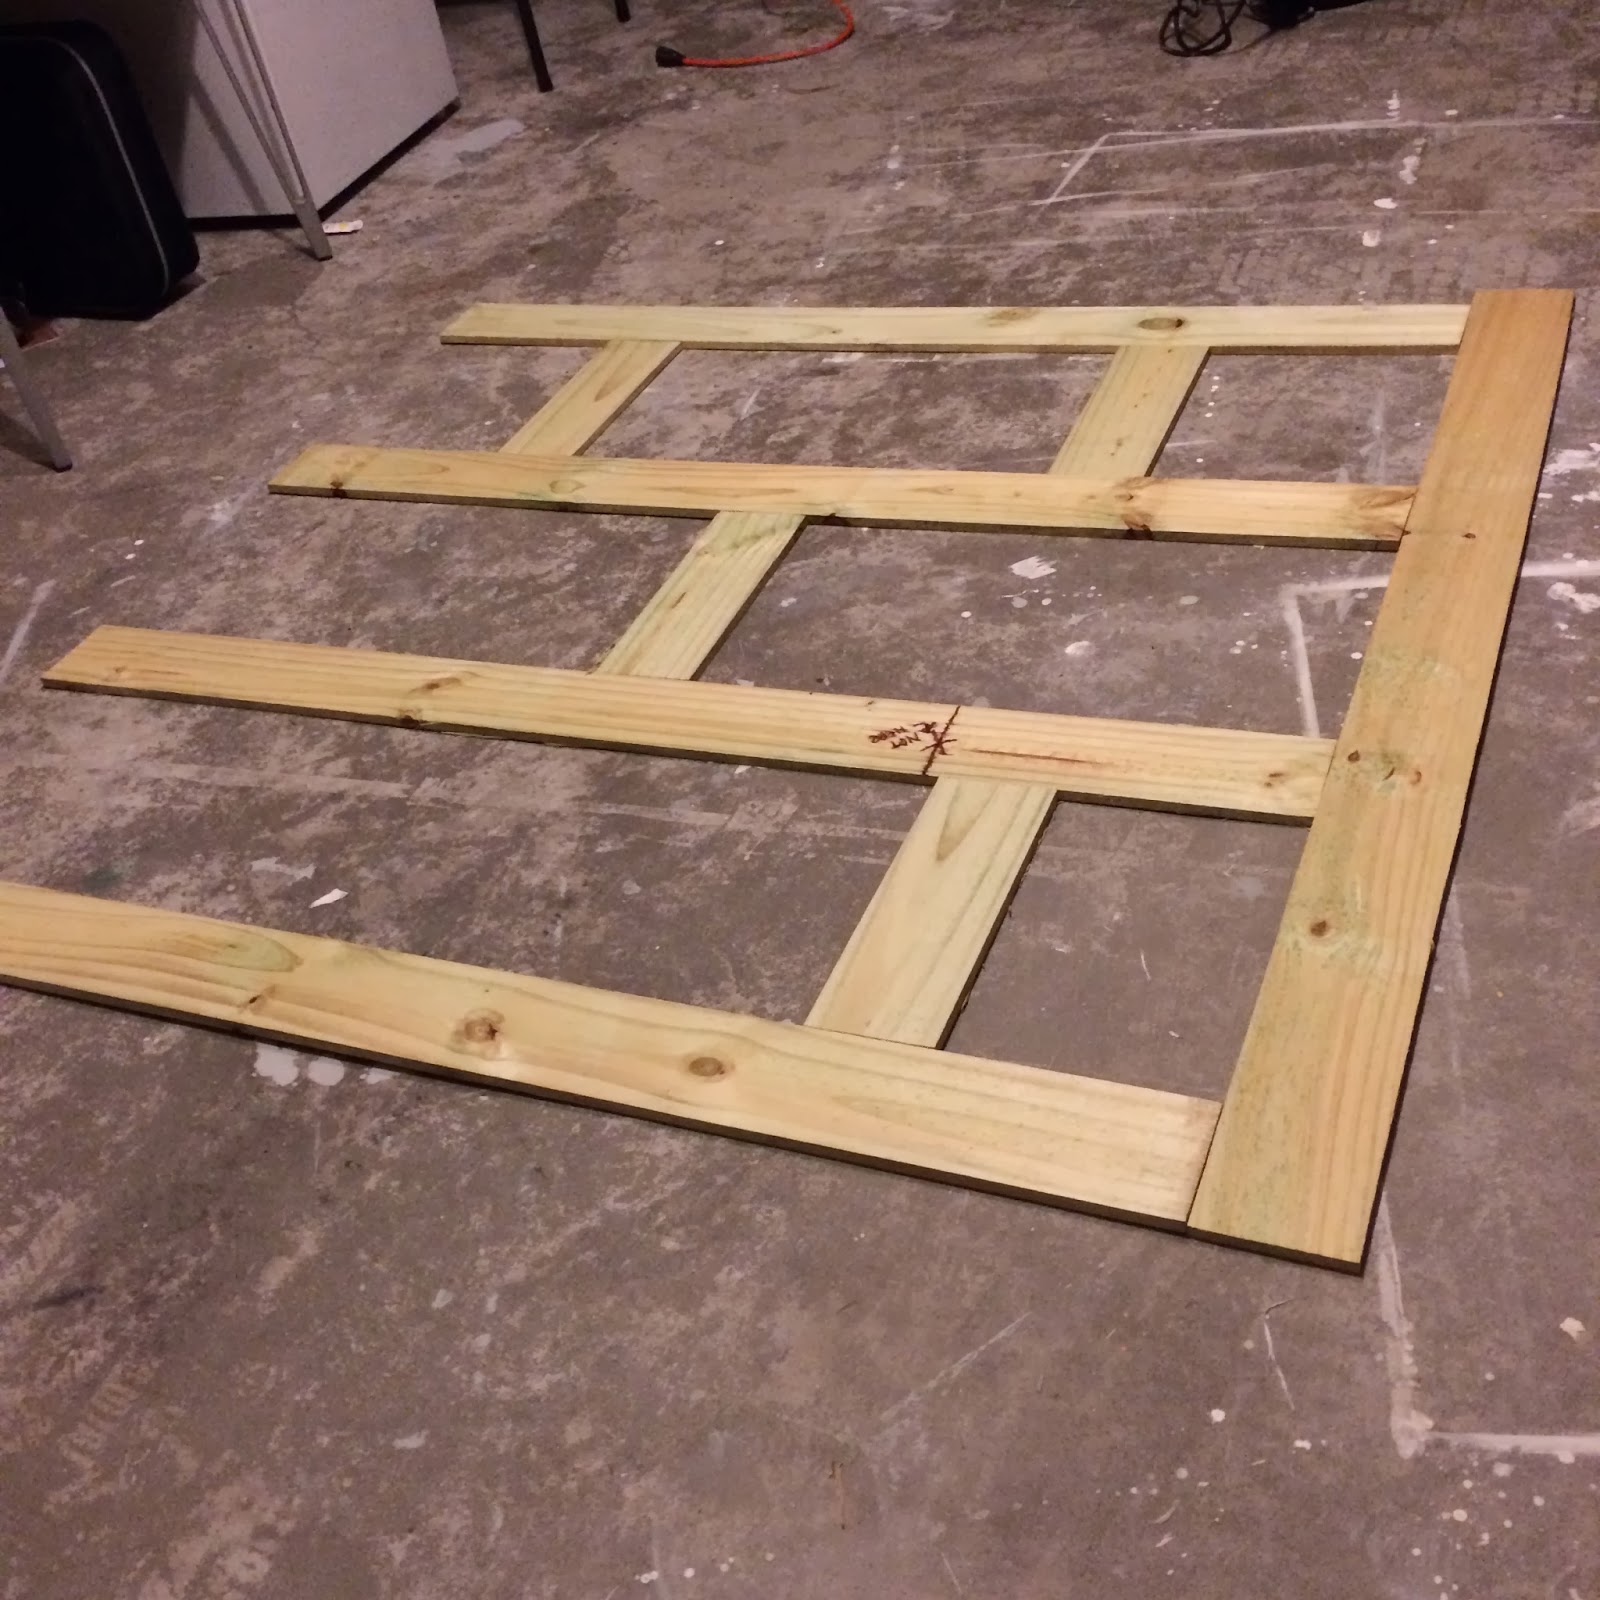
John then went to work nailing each piece into the panels he created.

Once it was done, this is what the back looked l like. The piece is heavy. I would guess about 20 - 30 lbs. In hindsight, it would have been better if we used a thin wood board backing, but this still worked out fine.

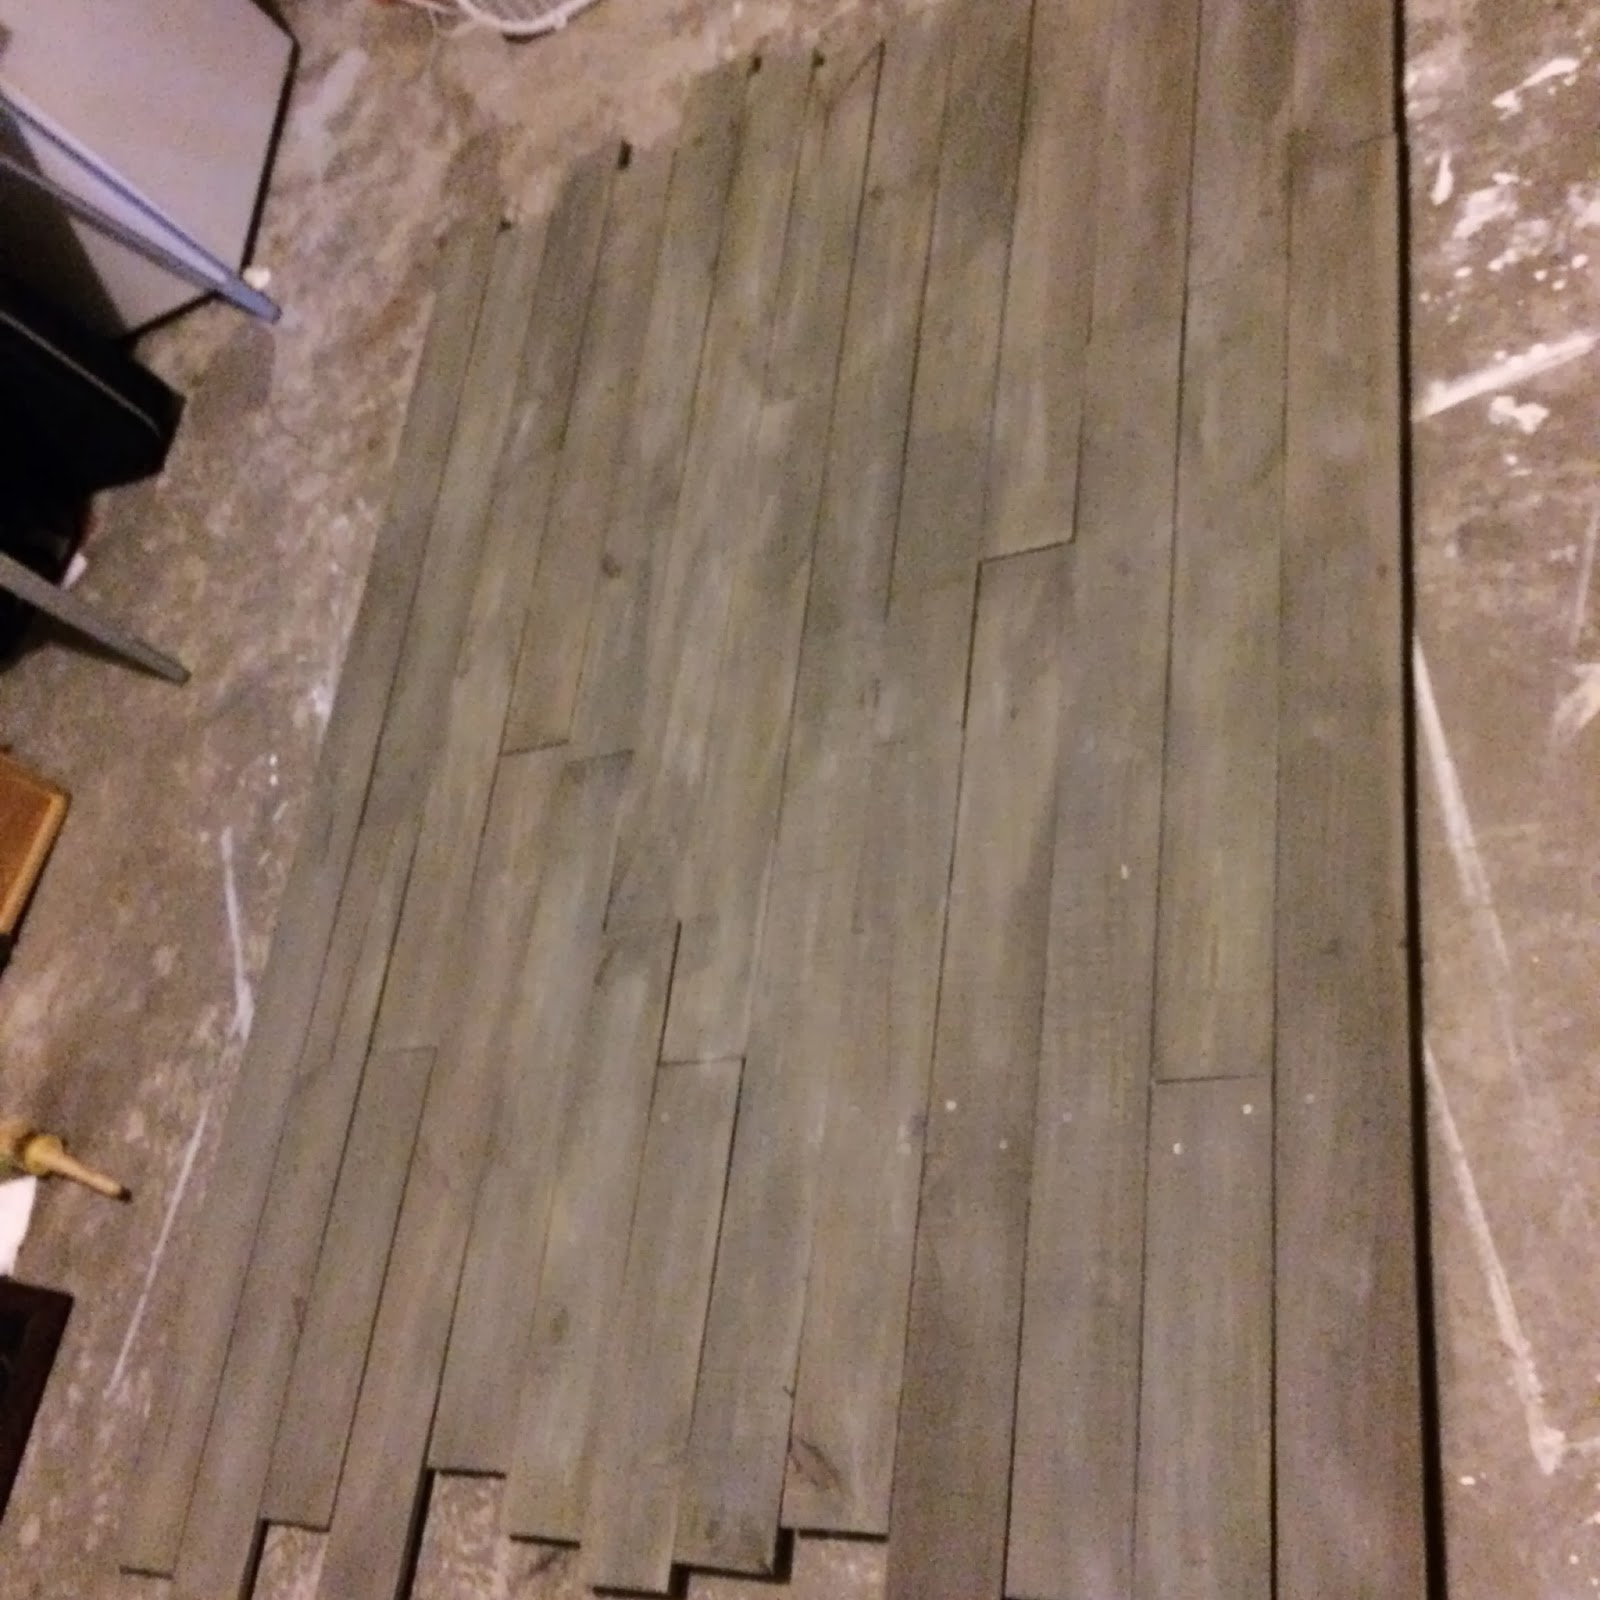
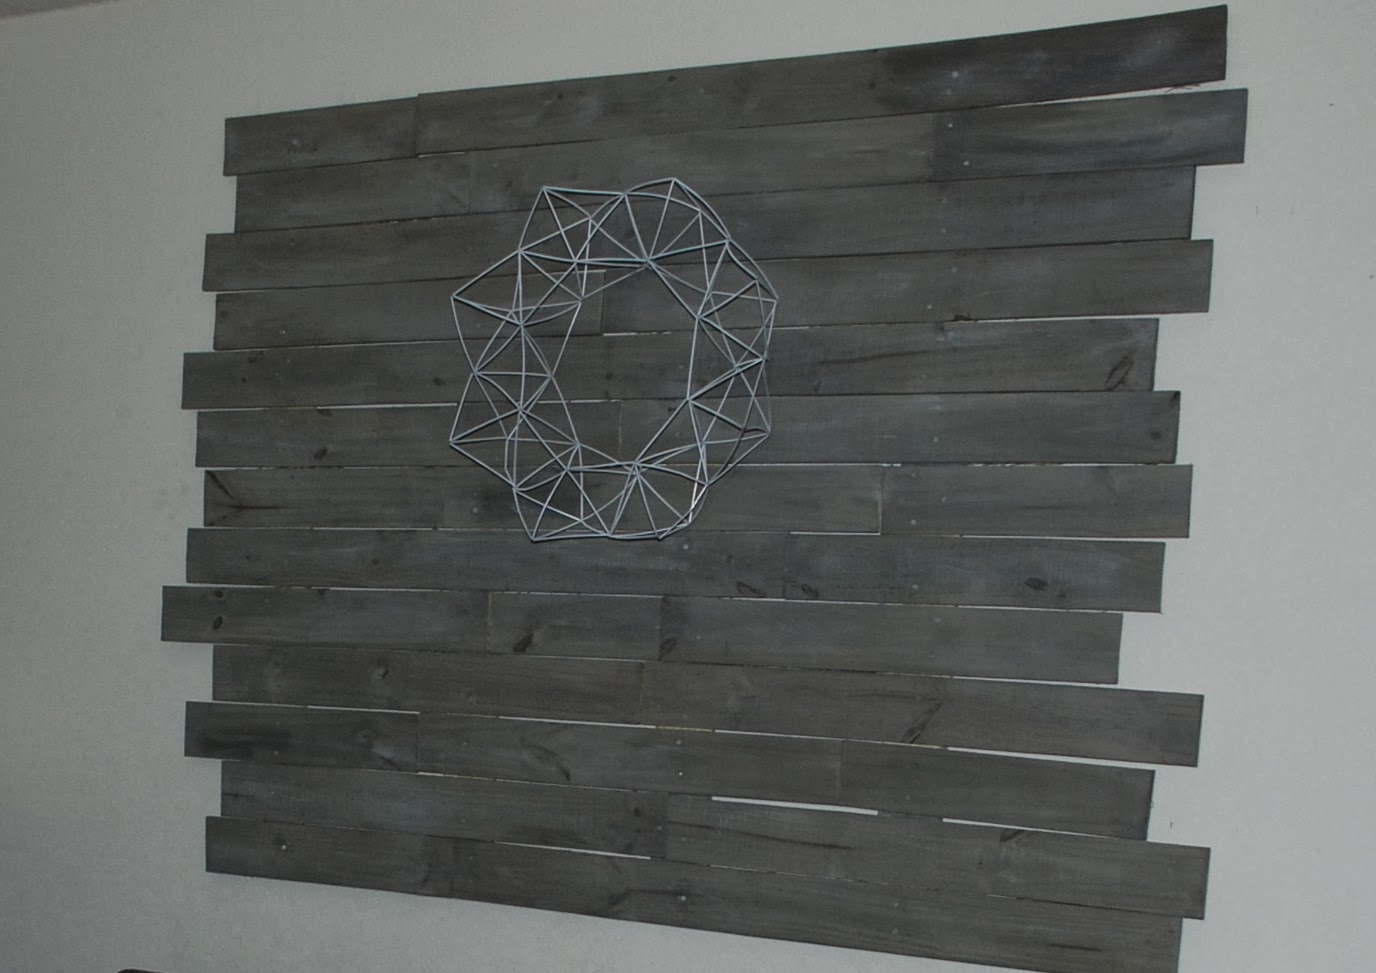
Once it was built, I checked to see what colors of Miss Mustard Seed's Milk Paint I had on hand. I had Grainsack which is a bit of an off white color and would have worked as a wash and what I originally thought I would use. I also had Typewriter which is a black, totally not right for this piece in our living room, but washed on it would really make it a statement piece. I also had a few of her more colorful options, that just weren't what I had in mind, and lastly Trophy, which is a deep, rich grey. It was a little darker than I thought I wanted, so I did one part milk paint to a little more than 2 parts water. I added a little bonding agent for good measure. I don't think I needed it, since the untreated wood would soak in the paint, but not wanting to take a chance on chippiness on this piece, I added some in anyway. Before I painted it, John sanded the whole thing down so it wouldn't be so rough.


I loved the end result, and wasn't sure I should wax it, since it seemed perfect as is. But I figured it wouldn't hurt. So I used Miss Mustard Seed's Antiquing Wax and then I added some of her white wax for good measure.

The above photo shows the white wax before I rubbed it in. I really thought I ruined the piece at this point. It was so hard to rub in to the untreated wood.
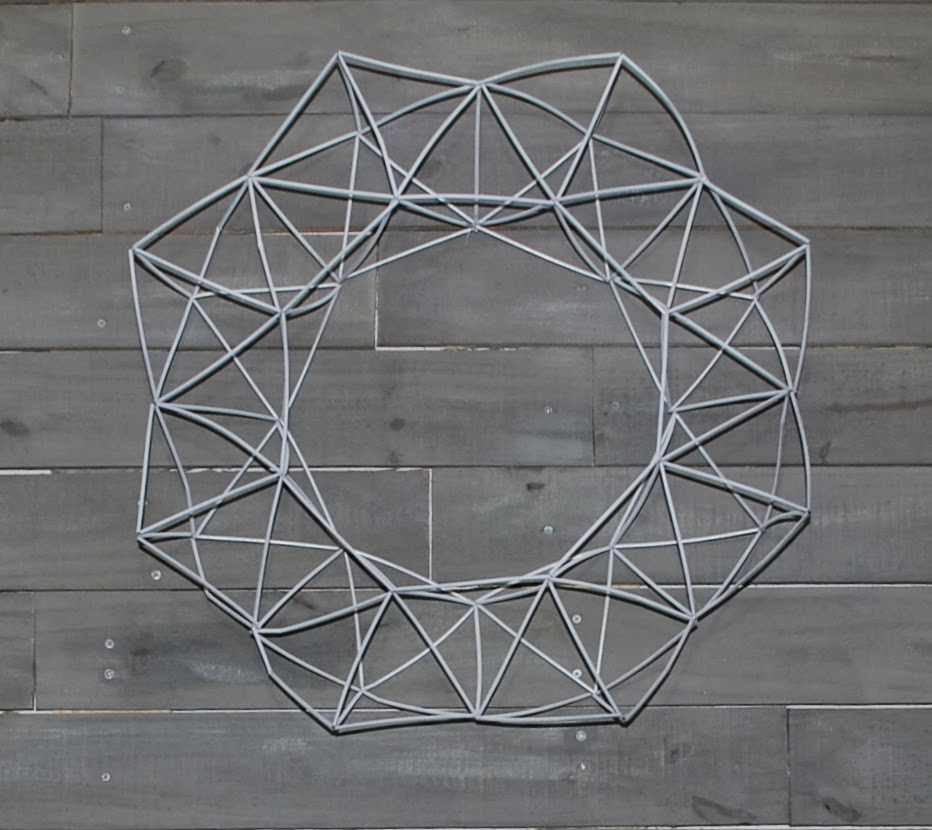
It actually perfected the piece! I love that you can see varying shades and some of the wood grain beneath coming through. I couldn't wait to hang it on the wall! So while the wax was curing, and since it was early on a weekend morning and the entire house was asleep, I decided to do some guilty Facebooking. A blog I follow did an update on their blog, and then I started going through projects on their blog for ideas for how to decorate my new wall piece, and that led me to Vintage Revivals blog. I was immediately entranced by her style and decided to look up past DIY's on her page. I came across a Himmeli wreath, which after looking up what the heck Himmeli meant, I watched her tutorial. You can see it here. I watched it one more time and then the other version here. THIS is the piece my planked piece needed. I knew it instantly. I decided to go with the first option and I was off on another DIY for the weekend.
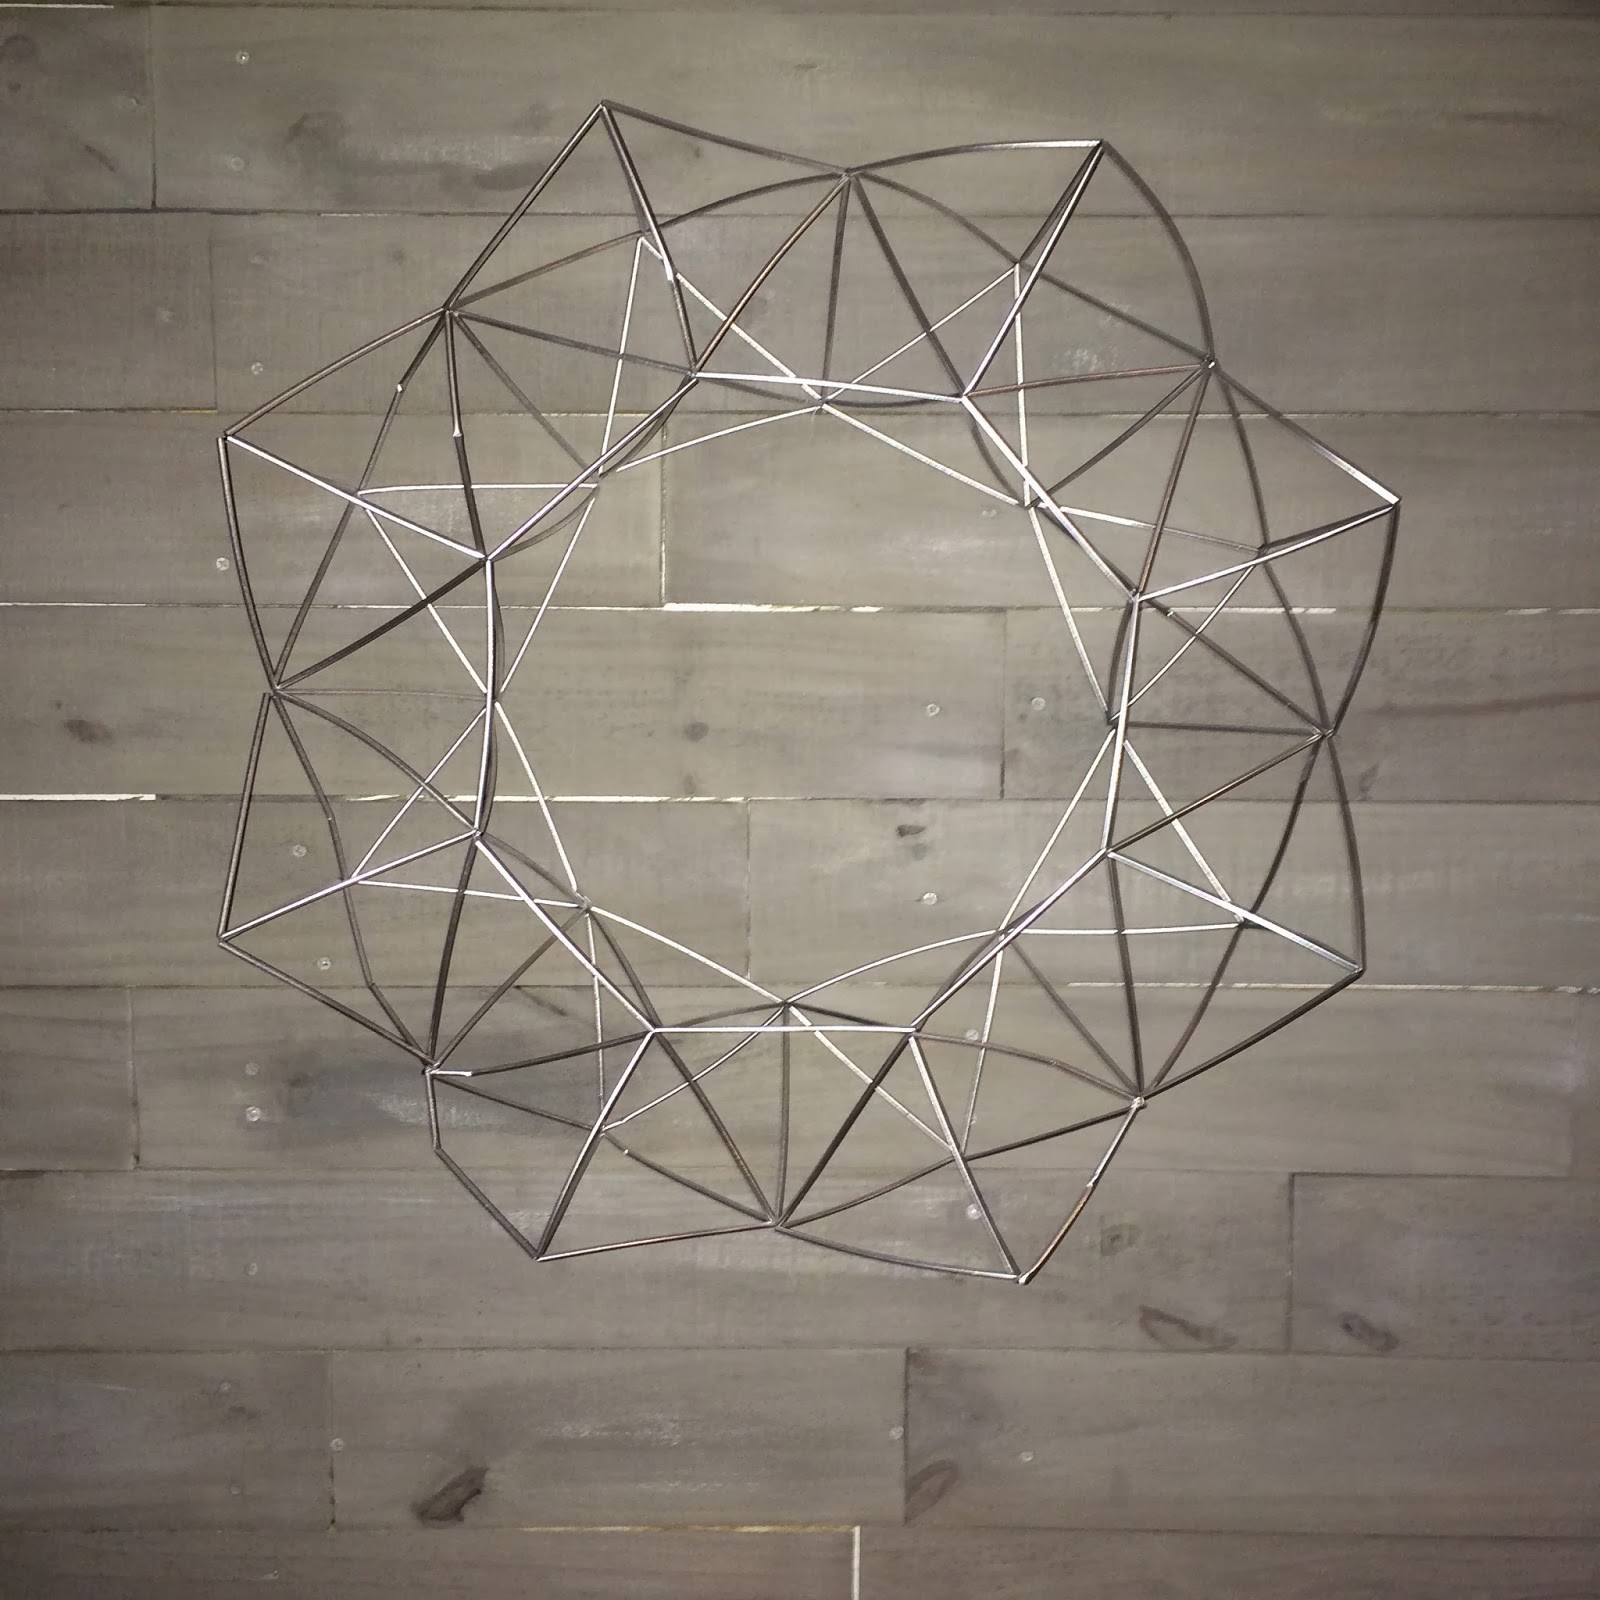
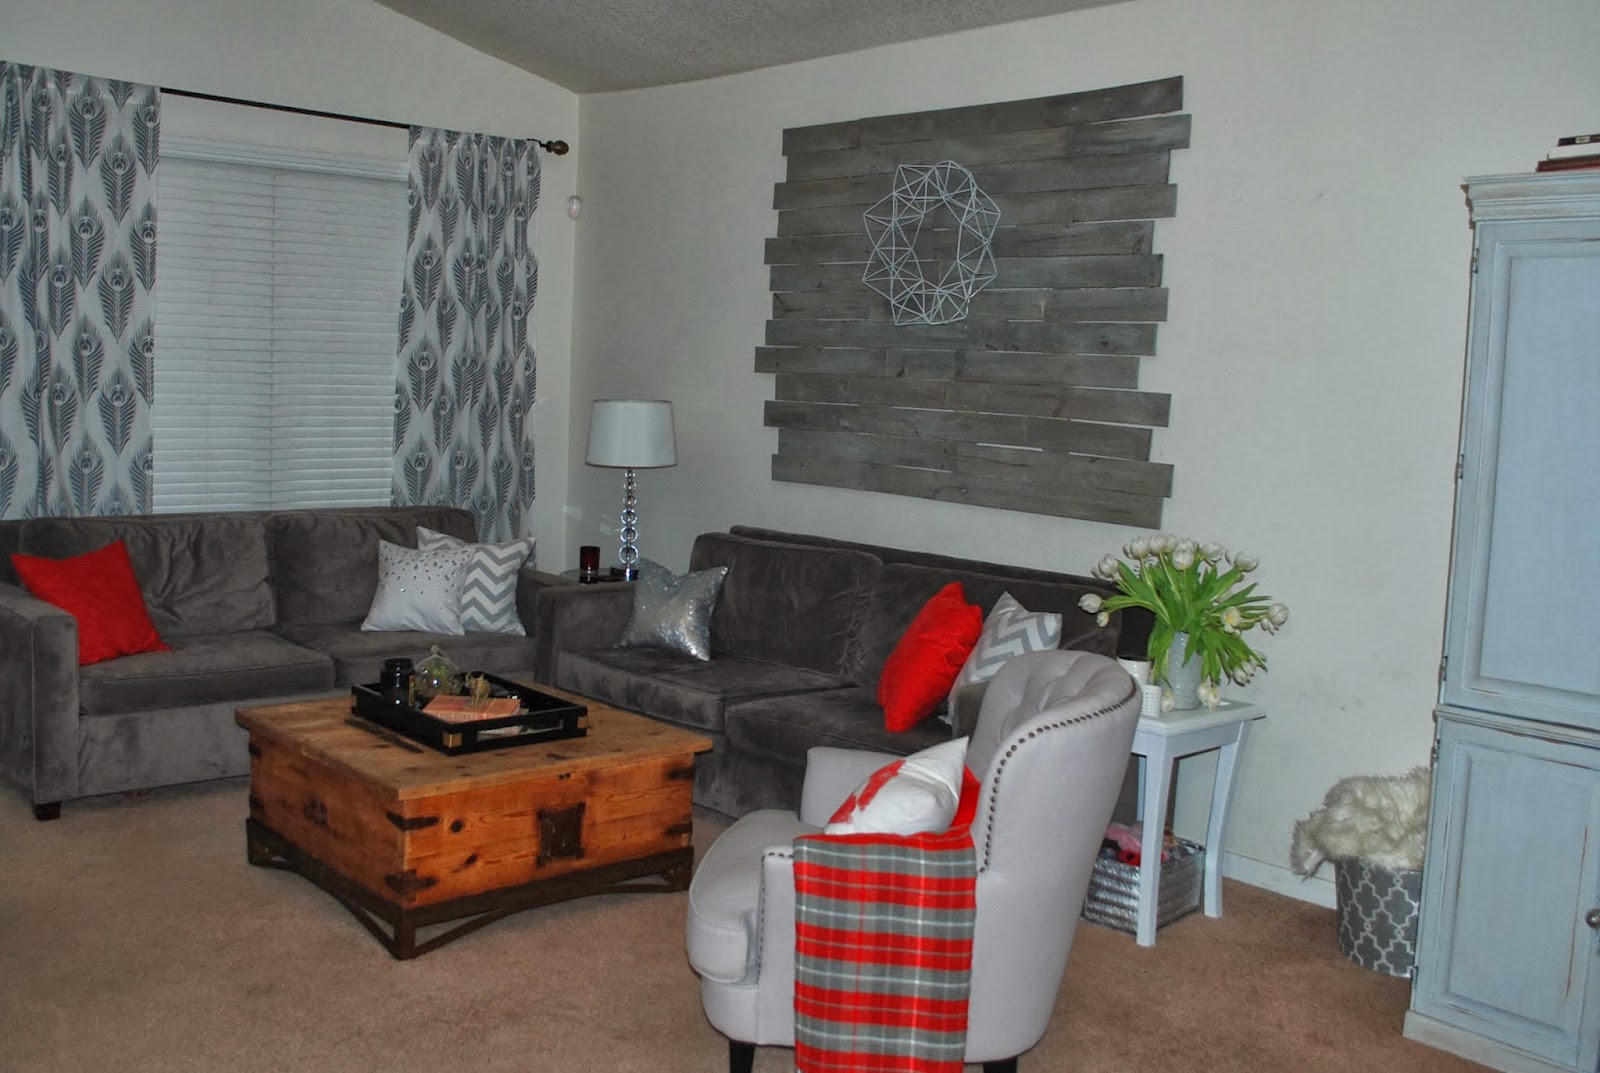
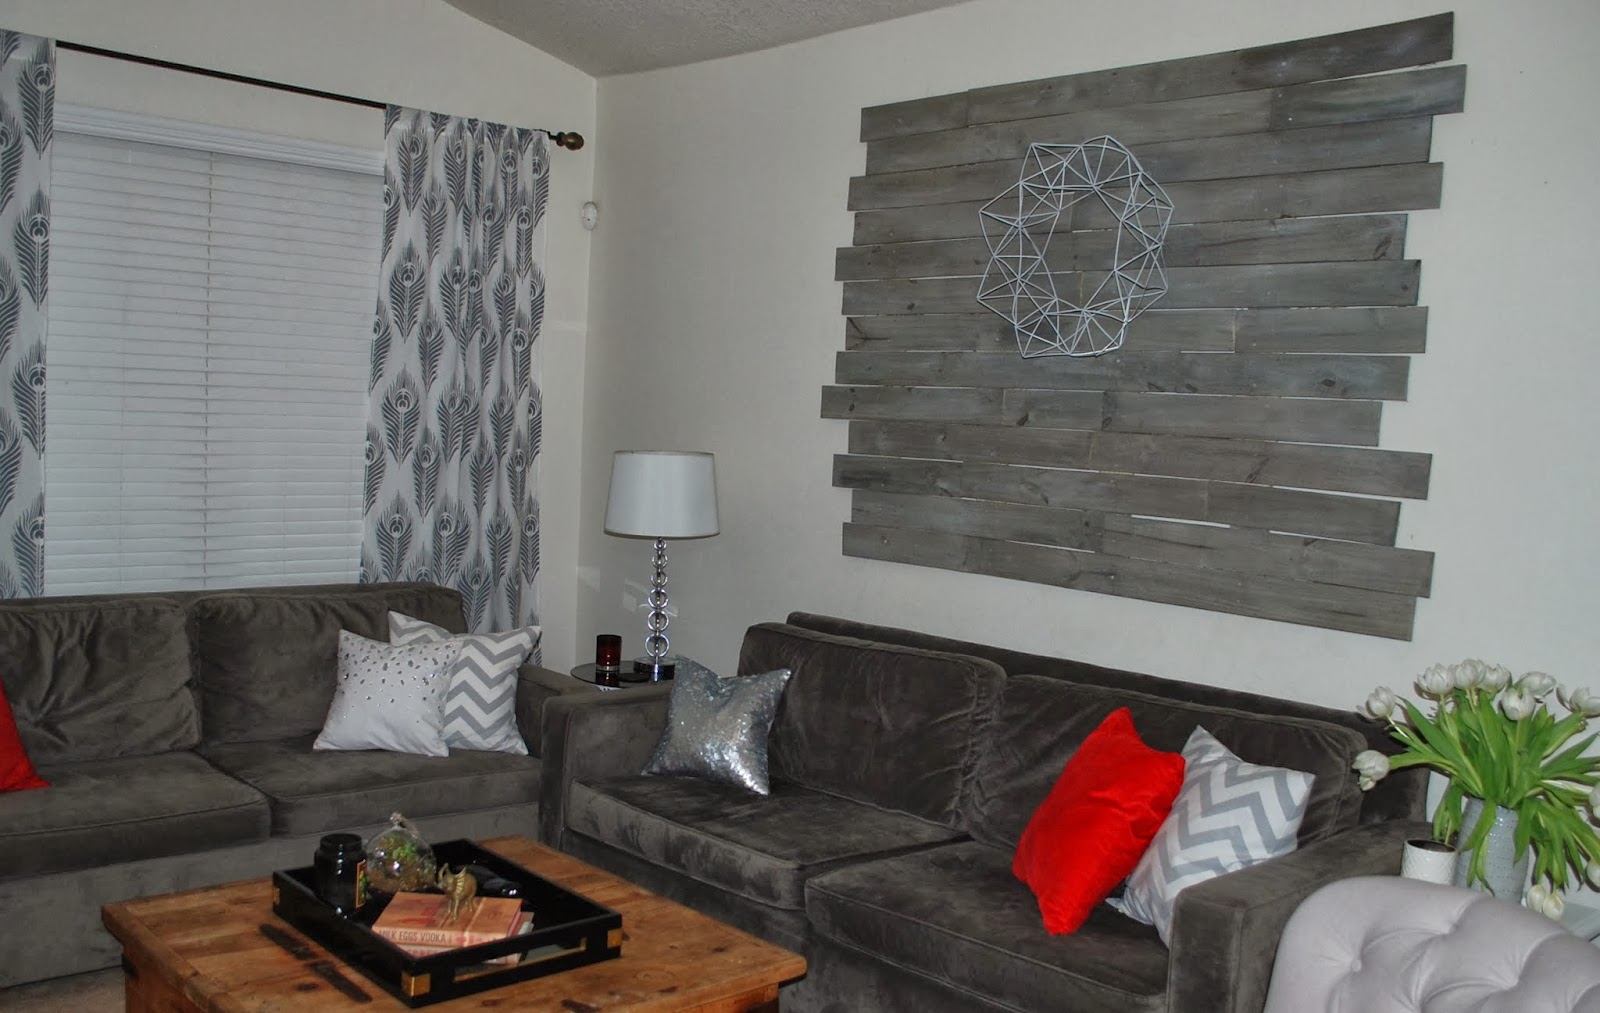
I spray painted the Himmeli wreath in silver and it just got lost in the plank piece. I then sprayed it haphazardly in white so that some silver would show through and now it made the impact I wanted. LOVE this piece! It's perfect and it cost just over $6 and a little over an hour to make! You won't believe how it's made and what it is made out of. You will have to click over to Vintage Revivals blog to find out.
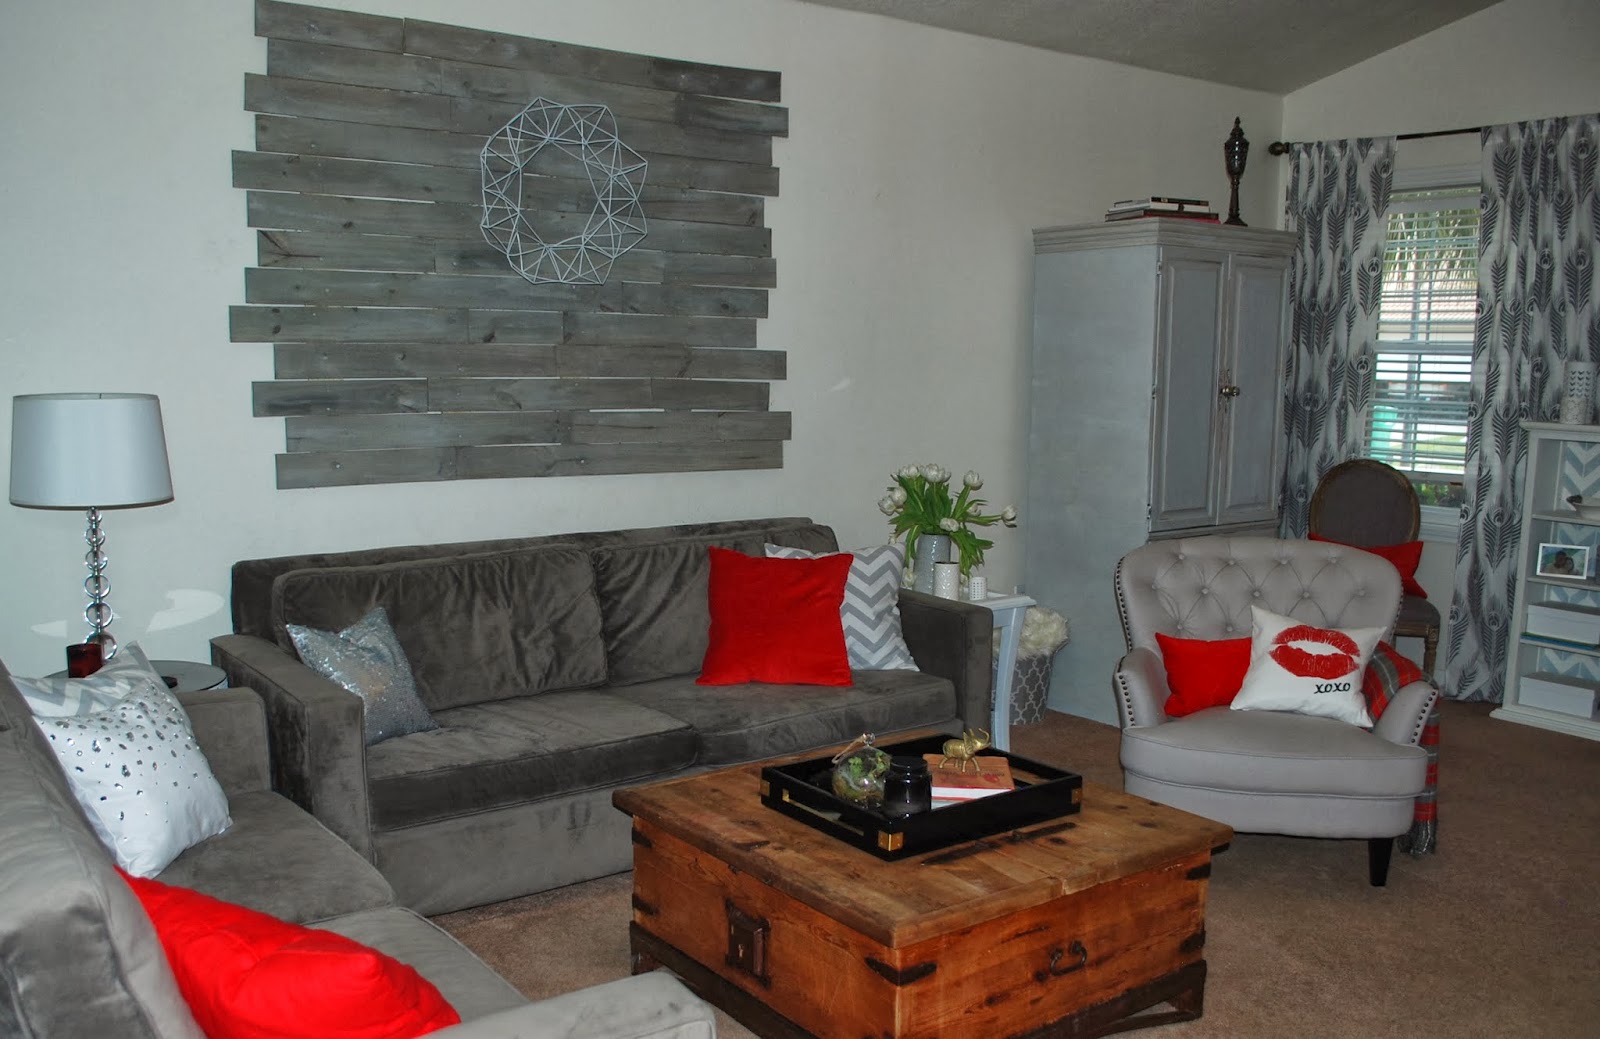
I am so in love with how it all came out. I really can't wait to update the coffee table and entertainment center now. I feel like I actually have a beautiful and comfortable home now. Every time I walk into the room the plank piece catches my breath and the Himmeli wreath makes me want to just stop and stare. I think I've taken about 50 pictures of the living room, I am so in love with it.
No comments:
Post a Comment