Thursday, January 30, 2014

Splendid Indigo Dye Spring 2014

I learned of the Splendid brand last year while in San Francisco visiting a friend. We walked by this boutique and I saw this maxi dress and HAD to have it. The material is so incredibly soft and comfortable and still stylish. I could live in that maxi dress! So when I saw this press release in my inbox, before even considering sharing it with you all, I had to go pick out my must have items from their site! I'm not ashamed to admit it. And I wouldn't be me if I didn't. I don't plan on sharing many Press Releases here with you guys, but this one is too good not to share, especially if you're ready for Spring! 


Press Release 

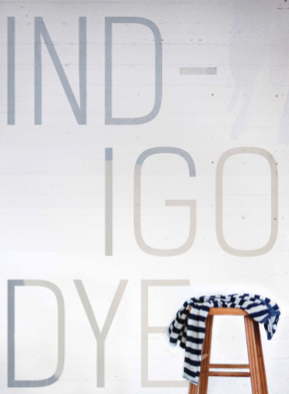
Los Angeles, CA – For Spring 2014, Splendid is excited to unveil a capsule collection called Indigo Dye, derived from a marriage of indigo dyes and Splendid’s lux knits resulting in a crisp, modern assortment that plays perfectly with the full array of the Spring 2014 collection. The brand’s LA roots served as inspiration for the collection, from neighboring denim washhouses to rich ocean hues, Splendid’s Indigo Dye offers a rediscovery of the color blue.

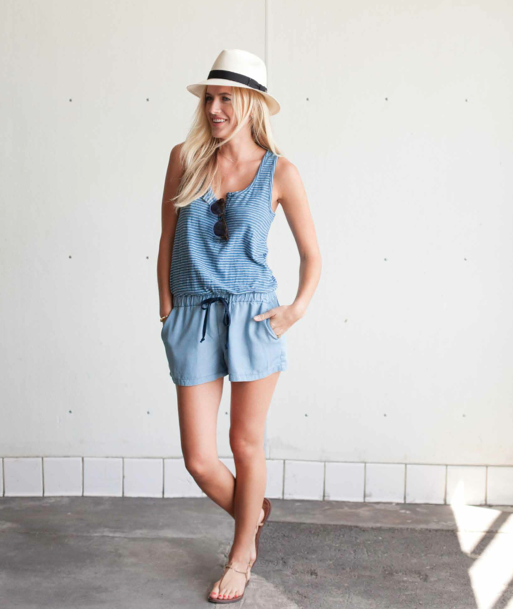
SHORT ROMPER // MINI STRIPE // MEDIUM WASH 
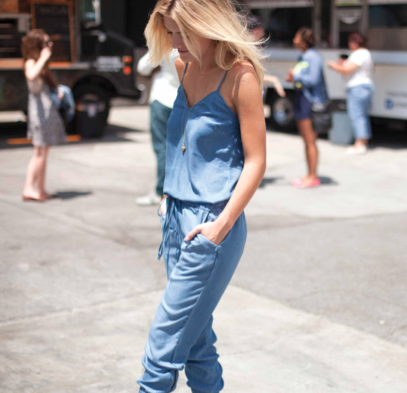
The Indigo Dye capsule collection serves up a fresh approach to tees, French terry and chambrays in a mix of solids, classic stripes and dark to light washes for men and women. Each piece in the capsule is dyed and manufactured in LA`s premium denim washhouses through a highly specialized process allowing the design team to play with color and texture. The dye process also allows for uniqueness in each item with varying shading and distressing, making no two garments the same. Rompers, tees, sweatshirts, dresses and shirting comprise the capsule; all offered in the brand’s signature comfortable, sophisticated, classic style.

Chambray Jumpsuit


Indigo Dye Must Haves:
The Light Wash Sweatshirt
The Long Sleeve Rugby Stripe Henley
The Dark Wash Muscle Tee
The Short Sleeve Pocket Crew Tee
The Dark Wash Cardigan
Sweatshirt Vintage/Lightwash

About Splendid:
The Splendid® brand is the culmination of a ten year quest to create the ultimate t-shirt. The success in designing an extraordinarily soft material cut into perfectly chic silhouettes was the platform for what is now a complete lifestyle collection of ultra-comfortable, effortlessly stylish collections for women, men, kids and babies. Known for it’s vibrant palette and bold stripes, Splendid® offers classic, colorful styles across multiple product categories including apparel, footwear, intimates and swim. Splendid® can be found at its retail locations across the US and Canada as well as at high-end department and specialty stores domestically, internationally and online. For a full listing of stores, to shop online or for additional brand information visit Splendid.com

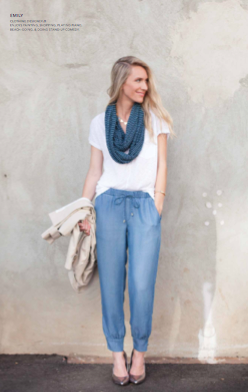
Chambray Pant & Infinity Scarf mini stripe/dark wash

One thing they don't mention in their press release is that their lookbook was shot using real people not models. I love that, and I'm here if you need me Splendid! LOL! After checking out the collection, these are my must have items:

The Chambray Pant - I love sweatpants, I love cute drapey dress pants and I love jeans. This is like all 3 in one! I NEED these! 

The Chambray Jumpsuit - I have been searching for a cute romper that would work here in our casual beach town. I mean does this not just scream beach vacation? Adding to the NEED pile! 


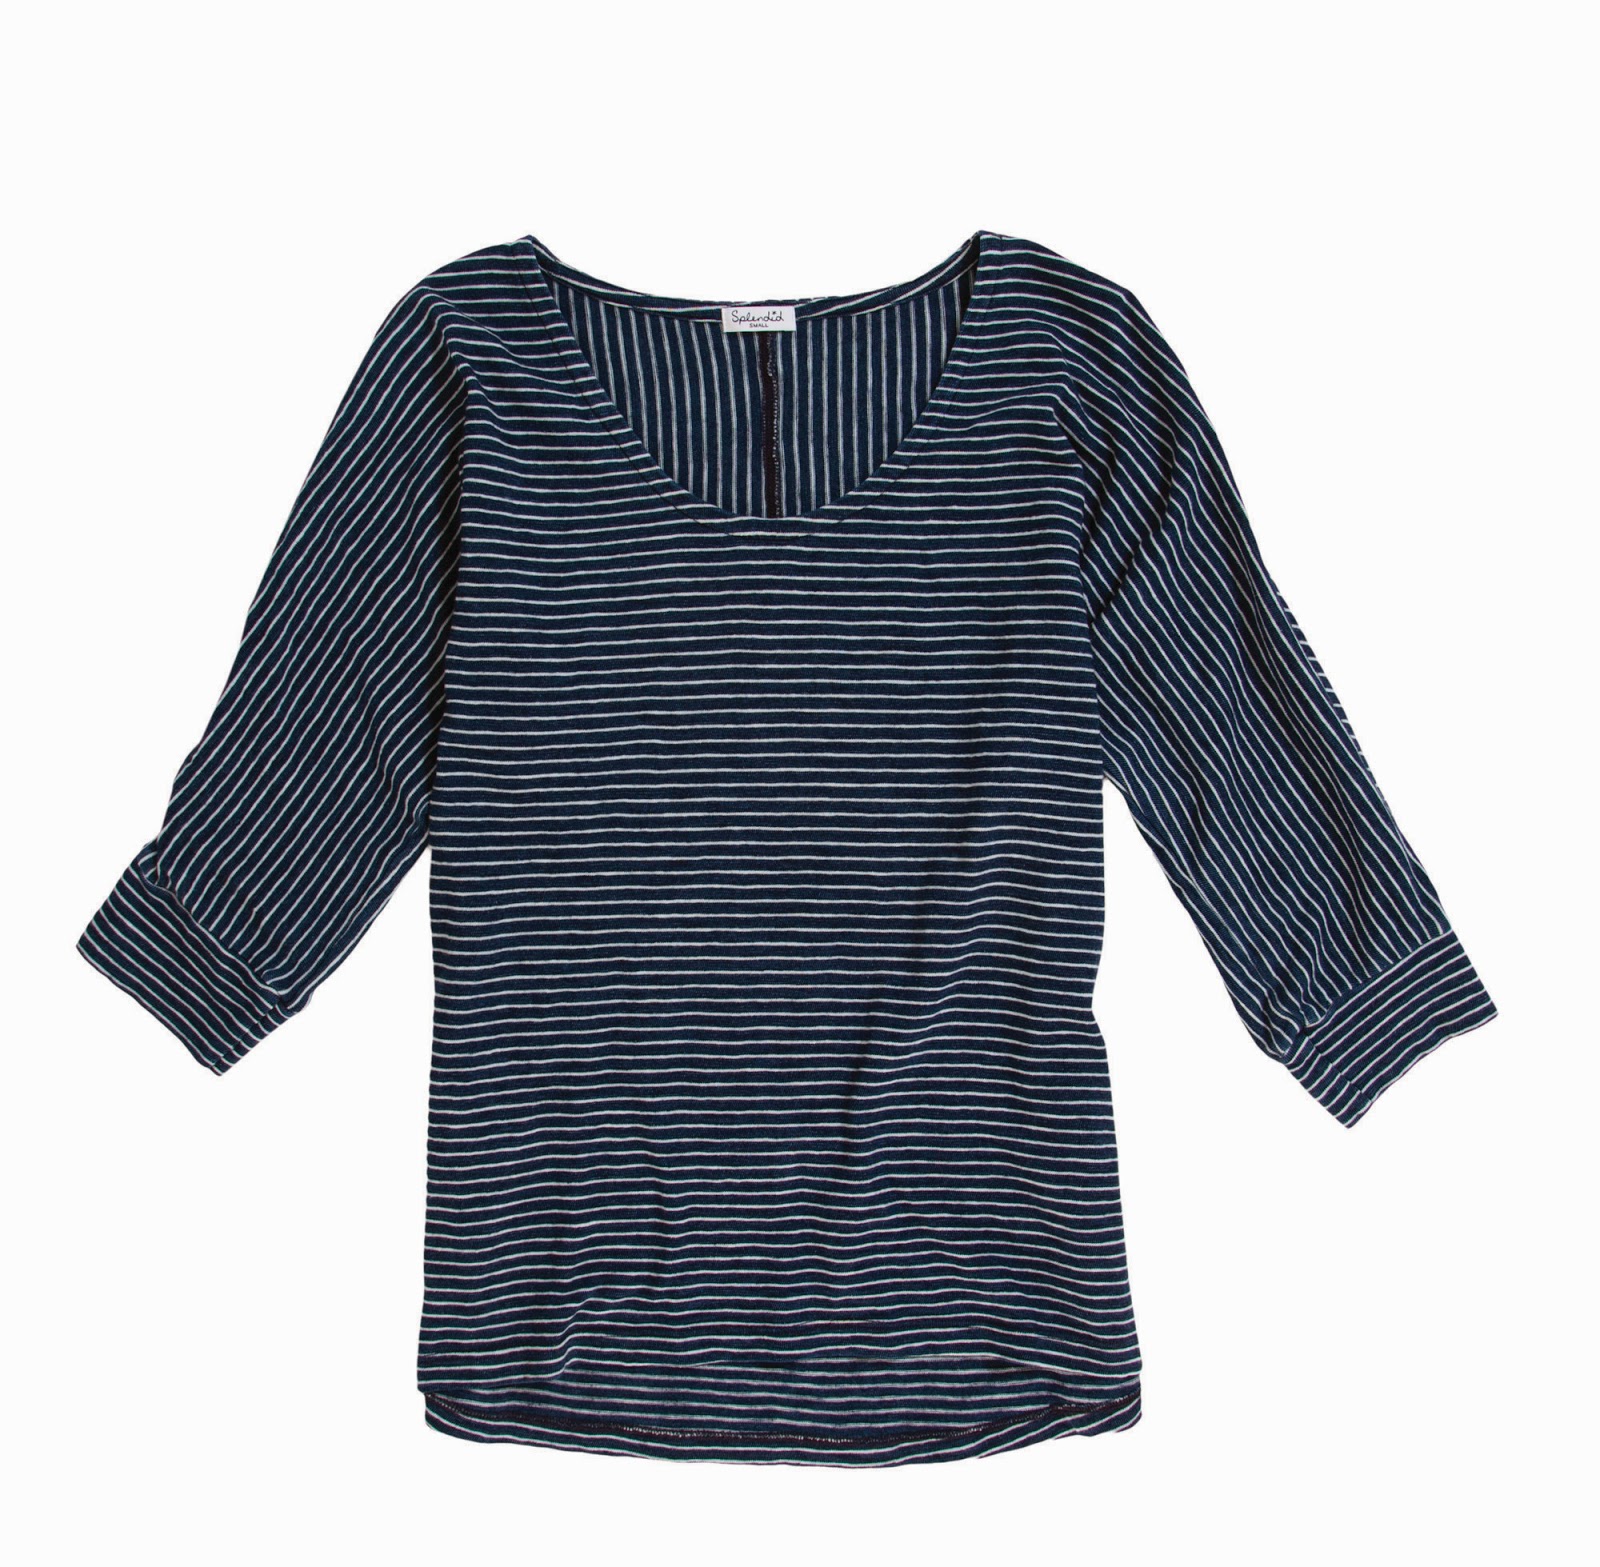
The Indigo Knit Dolman Top - There is nothing I like more than a 3 quarter leave knit top for Spring here. It is the perfect transition piece. I can wear it over a swimsuit while paddle boarding, with shorts to stay a bit warmer than a tank or short sleeve tends to offer, or with jeans. And if it is as soft as my maxi dress by Splendid, I am all in!

Do you have any Splendid pieces? Which is your favorite? I encourage you to go on the Splendid site and see if there is a store near you and go try on some pieces. But I warn you now, you won't leave empty handed. 


Wednesday, January 29, 2014

Just A Few Days Left of the Passionate Dreams Pre-Sale

As I contemplate a quick mani before heading to the office today, I am leaning towards Angel Whispers or Lethal. So while I figure it out, how about one last look of the Passionate Dreams Collection?

Angel Whispers - I love this as our first ever Texture polish. I can't get enough of it. It tows the line between pink and white with tons of shimmer and subtle texture. Since this has a gritty texture in a creme base, this is going to be a bit thicker of a polish. I applied a thin coat using light pressure. I didn't worry about the application too much since like all our cremes, it is self leveling. I waited for the first coat to completely dry before applying a second coat to prevent dragging due to it's gritty nature. The finished result is a flawless textured look that reminds me of Angel wings. 


Ignite - This one is like a jelly meets cream with tons of silver and subtle bronzy shimmer. I only used one medium application coat here. I usually apply my polish with a thick coat, I am trying to learn how to do my nails with thinner coats. This is without top coat. It dries somewhere between shiny and textured. I feel like I could wear this for a statement mani without doing anything else to it. Such an edgy look. 


Lethal - OMG! We finally have a silver foil! I can't tell you how excited I am to finally have a silver foil! And everywhere I look, everyone seems to be sporting a silver mani! Super excited about this one!  This is two thin coats. I used light pressure. Since this is a foil, the less your brush presses into your nails, the better the results. 


Kiss - Wax finish red. OMG another favorite of mine. This is two thin coats. I let the first coat dry before applying the second coat. Again like all our cremes it is self leveling, so I didn't worry too much about application on the first coat. To keep the wax look don't add a top coat with this one, but don't forget your base coat! 

I think what I love about this collection is that it is sooo me. It is like every facet of me rolled into one collection. I feel like at first glance my appearance is a bit classic, but when you know me and peel back the layers, the edgy fun side shines through. I love tattoos, and funky styles, I just prefer to keep my tattoos "hidden" and my looks classic with a hint of edge. When you first look at this collection the colors seem to be a classic pink, a black, a silver and a red. But when you look you see that classic meets edgy and modern. I am just sooo excited for everyone to try it out! I didn't realize when I made this collection how it also works for a perfect nail art combo or Valentine's Day mani. I can't wait to see what everyone comes up with for looks using these colors. That just makes me more excited! I hope you all love it as much as I do! Pre Sale ends Friday, January 31st. You can snag your set now for $35 here. We have about 200 sets left in stock and all the colors are limited edition with the exception of Lethal. You don't want to miss out! 

Tuesday, January 28, 2014

DIY Stencil Curtains Using Cutting Edge Stencils

By now you all know I have been on a stenciling kick lately. I'm pretty much stenciling everything except the walls! The walls are only bare because we are in military housing and moving in the next few months. I can't say my future walls will be as safe! A lot of you also asked how I did the stenciling and if I could do a tutorial. I'm going to try my best here.

When I was stenciling the armoire and bookshelf, I had bought some stencils from our local craft store. I was getting so frustrated with the stencils and felt they had some improvements that could have been made on them. I went online to see how people navigated around the corners or tops of the walls since the backing on the bookshelf could not be removed.  My search for help led me to the  Cutting Edge Stencils website. These stencils are different in that they are made of a clear plastic that is bendable without losing their shape. They also have to edging pieces to help make stenciling something like a wall easier. I just had to give them a try!

Photo courtesy of Cutting Edge Stencils - Peacock Feather Allover Stencil

First up, I made (am making) the curtains. My sewing machine broke, and a friend offered to let me use hers. I won't be able to get to her house to sew the curtains until later this week, but I wanted to work on stenciling the curtains last weekend, so I made the curtains using Stitch Witchery and will sew them up later this week. I basically went out and bought 13 yards of muslin fabric in white. I wanted sheerish white curtains without lining to let the light in and I needed them to be on the longer side. Standard 83" curtains are too short 96" curtains are too long. I guess that's what government housing gets you! LOL! I kid, because if I could buy the house we are in right now, I totally would. But I digress, so I bought muslin and cut it to the length I thought I wanted (they are still too long and will be shortened when I sew them). Once they were all set to go, my friend Alyssa came over and helped me stencil them.

Photo courtesy of Cutting Edge Stencils - Peacock Feather Allover Stencil

Cutting Edge Stencils also offers a stencil kit that includes a dense foam roller, a stencil brush and a small level that you can attach to the stencil when you do a wall. I didn't need the stencil brush or level for the curtains, but they will come in handy once I have a wall to stencil. I have asked several of my friends to let me stencil one of their walls for a review. No one seems to trust me enough. :( I have a feeling they will change their tune once they see my curtains!

Here is what you need to make 4 panels:

Cutting Edge Stencil (We used Peacock Feather Allover Stencil) Cost varies, this stencil is $42.95
Dense Foam Roller With Handle - We used the one by Cutting Edge Stencils for $5.95
13 yards of fabric or curtain panels (I bought fabric, but Ikea has really cheap panels already made, we just don't have an Ikea near by.) I paid $30 for the fabric.
Plastic Painter's Tarp - I already had one but they are pretty cheap like $2 maybe?
Painter Tape - I already had some on hand but I think it cost about $7
8 bottles of acrylic paint and 2 bottles of textile medium - $10

Total cost - about $95
Cost per panel - about $24 (Cost can vary based on your selections)

You can probably find curtains for $25 per panel, but for me, I have gone through several panels in the last year trying to find the right ones, which led to my desire to stencil some. Just check out and search Stenciled Curtains, if you need inspiration. I just wasn't finding what I wanted for less than $50 a panel. I also love that the stencil can be used more than once, so I can actually coordinate a look in a room. Which I totally want to do the feather pattern on the wall behind my bed in a future house like Cutting Edge Stencils shows and then move these curtains to the bedroom.

OK, now that all that is out of the way, let's get to the fun!

Laying down the stencil for the first time.

We started off by laying a painters plastic tarp on the garage floor and taping it down so it wouldn't move. Then we layed the first panel down on the tarp and taped it down. We wanted to make sure it would stay straight and smooth. Turns out the stencils are so intuitive that we didn't need to tape down the curtain, so we skipped that step with the third and fourth panel and they turned out just as good and straight as the first two.  I really liked that the stencils have these little guides that you use for lining up the stencil. If you look at the wall images from their site that I posted here, the feathers are really close together in their final design. You just have to line up the guide over the feather above it and keep going down the curtain (Or wall) vertically. Alyssa and I opted to put more space between the feathers, so we taped the guide with bright pink duct tape so we wouldn't accidentally paint over it and so we could see through the paint where to line up the stencil. We came up with our own identifying points of where to line it up using their pre cut guides to help us and created some indicator points on the feathers we just painted as to where we would line it up. I mean with their guides and our queues, we were able to line up several spots on the first try. If you've stenciled before, you know how good that feels! We felt pretty proud of ourselves!

Alyssa and I were discussing the guides on the stencil and how we would use them.

We also sprayed adhesive to the back of the stencil a few times while we were stenciling. This helped the stencil "stick" to the curtain. If you do this, you just want to spray enough adhesive to make the back of the stencil tacky. We sprayed once or twice per panel.

Here we go!

I used regular acrylic paint to do 4 panels. We used 8 bottles of acrylic paint and 2 bottles of textile medium. We needed 4 bottles of the textile medium according to the instructions, but Hobby Lobby only had 2 bottles left and I didn't feel like going to Michaels or Wal Mart. It worked out just fine and my curtains don't look crunchy like I was worried about. You can kind of feel the paint, but not too bad. I think that will go away when I wash them.

Alyssa started lifting the stencil off, I had to hold my breathe and hope it worked out! 

It took two of us just over an hour for the first panel and then about 45 minutes for each additional panel. Not to bad for a day project and to completely change up your look.

Here we go!

Gah! Perfection! I couldn't wait to keep going now!
Using the top edge piece for to top of the curtains.

Lining up the stencil using the guide, which you can see here in pink, since we placed pink tape over them. 

Close up! 

1st panel complete!

I am in love with how they came out and the spacing we chose, which is different than how the stencils are designed. Gotta love flexibility! 
I watched several videos before tackling this project and I went in feeling pretty confident that I could do it. But I was still anxious about how they would turn out. Now I would have no qualms about stenciling other fabric options.


First set done and hanging behind the couch. Each panel took about 30 minutes to dry to the touch. We hung them to dry so we could continue with the next panel without waiting. 

Living Room Makeover
You finally see the other side of my living room! This is the table we will be re-doing soon. We'll also be changing/updating the photos on the back of the wall. 

Living Room Makeover
The computer side of my living room, which you've seen a million times by now! 

Living Room Makeover
Oh hey new chair! I found my chair on Joss and Main! So excited! It arrived as I was taking these pics, so I had to get it in place real quick! LOVE! 
If you know me, you also know as a small business owner, how much I love small businesses and how much I love the story of how they came to be. If you want to learn more about this amazing company read their About Us page, go through their blog, watch their videos. I have spent countless hours on their site and each time I find new things and want to stencil more! This could be dangerous. They have made me a fan.

Now on to the next living room project...


Monday, January 27, 2014

I saw a few FB posts on friends feeds about bloggers sharing the love. I have to admit, I am off the nail blog reading game right now, so I missed all the fun last week. When I am working on colors, I can't look at blogs or I get stuck or influenced by the what I see, so I take a hiatus unless someone is sending me a link for a Cult Nails post or other post they think I can't live without. But I love the idea of sharing the blogger love, so I picked 3 bloggers to share.

STORM AND STARS
www.stormandstars.net


I met Lex at a meet up we did in MA 2 years ago I think? John and I instantly bonded with Lex and her  other half AJ. So now whenever we go home to visit family, they get a call to see if they want to meet up. The side benefit of Cult Nails is all the friends we have made, I can never say that enough. Not only is Lex pretty cool, i'm envious of her nail skills. Her blog is loaded with swatches, reviews and some pretty cool nail art.

She also has an Etsy shop where you can buy some of the cool things she makes like these character pillows. Adorable right? Such a talented individual! 


I haven't met Keisha from Refined and Polished in person, but I have been a long time blog follower and we have had the occasional chat via social media. I "feel" like I know her. She has also been a long time supporter of Cult Nails. Have you ever followed a blog and thought, "man I bet we could be friends, she's just like me!"? That is Refined and Polished for me. She just seems like she'd be pretty cool and fun to hang out with, and hello, her mani's are always flawless!!

POLISH ETC
www.polishetc.com


I found this blog through on Instagram. I have been a fan of her mani's for a while. She comes up with some pretty cool stuff. Since I follow her on IG, I recently checked to see if she had a blog. Turns out Polish Etc is a blog where 4 women came together and share their love of polish.  I love the idea of sharing a passion with other like minded individuals. I can only imagine the hard work it must be to coordinate with other individuals on one blog. I have to give them props for doing such an amazing job!

If you guys don't follow these blogs, check them out! If you have a blog, share it with us here in the comments, especially if you have a Cult Nails post, because we love seeing those! :)

Thursday, January 23, 2014

It's Coffee Time!

As some of you may know, one of our resolutions for 2014 is a "project" a month that John and I get to do together. Well things got a little derailed for Jan's intended project. You see, we have this wall between two doors that is right where our kitchen and dining room meet. We had an old Ikea wall unit on the wall as a "for now" fix for the empty wall. We had the unit in a few of our previous homes and when we got here, neither of us really wanted the wall units anymore, but for whatever reason, we weren't quite ready to get rid of them. I stuck one of the units in that space "for now" and 4 years later it was still there. We both hated it, yet we both left it there.
The Ikea unit that was in the dining/kitchen area now houses sporting goods in the garage.
I forgot to take a before picture. The Ikea unit now sits in our garage holding sporting goods. I really like it in it's new home! Perfect!

John was so sick of the unit in our dining/kitchen area, and mentioned that he wanted a coffee bar there in it's place. Of course my eyebrows went up. I was thinking "you want a what? There's a coffee pot on the counter and cups hanging, what more do you need dude?" But I gave it the ol' Pinterest perusal and found hundreds of coffee bars for inspiration. Now that I was seeing them, I was getting into the project. I liked the idea. John however was a little bummed that he wasn't as original as he thought.

The island we were going to build to use as a coffee bar, picture is from AnaWhite.com, link is below.
After some more research we (and by we I mean I) decided that we would build a coffee bar. I found this plan on AnaWhite.com for a kitchen island and I thought it would be the perfect coffee bar. So this was our goal for Jan. To build this island and make it our coffee bar!

Love at 1st Sight!
But then I went to a vintage.antique market with a friend and saw this gorgeous dresser. I don't know what it was about it, but I knew THIS was our coffee bar the second I saw it! It is a bit heavy looking as it's a substantial piece of furniture. But I instantly fell in love! I looked at the price tag and let out a bit of a deflated breathe. I told my friend, man if this was just $50 less, I would snatch it up in a heartbeat! I know it's only $50, but that $50 just took it over the budget. As luck would have it, the owner of the booth had just pulled the piece out of his truck and placed it in the booth and wanted to sell it before the market ended in a few hours and he came up and said, I'll sell it to you for $75 less than what the tag says! Are you kidding me? I didn't even need to negotiate! SOLD! I mean it came in well under my weekly grocery bill! Woot! Well actually I called John first, sent him pictures, answered what felt like a million questions, while I watched another lady inspect the piece. AAHHH I was about to lose my piece answering all these questions to John! He FINALLY said go for it and I snatched up the piece just minutes before the other lady tried to buy it! Phew!  I later saw another woman bust out a measuring tape and inspect the piece as well. My friend and I actually saw quite a few people inquiring about the piece while we were at the market. It's like it was meant to be mine! Timing is everything. But clearly my friend and I have great taste, because she bought a bench and two end tables and people kept wanting the pieces we bought. She even got an offer on the bench she bought. LOL!

I am all about the distressed look and that wood grain! LOVE!

Mine! It's all mine!

But I digress, John came and picked up the piece and brought it home for me. It is a perfect fit! We had to go buy a shelf to go above it and let me tell  you picking out a shelf was a project in and of itself. I spent an entire day going from store to store looking at shelves and brought two home and John nixed both. Then John and I went out looking and nothing. FINALLY we just bought a ghost shelf from Target as a last resort, which was what I originally suggested and John said absolutely not, he hates those shelves. But lo and behold in the end THAT is the shelf he chose for it! Grrrr. Men! We moved our cup hanging rack from where it used to be in the kitchen and placed it under the shelf and viola! The coffee bar is complete!

The initial set up

It's finally done! John is loving his coffee bar!
We bought the clock at Hobby Lobby to put on the shelf, which of course John was like, "Wait, we need a shelf to put our stuff on, but you're buying stuff to put on the shelf? WTF?" Why doesn't he get it? I also bought a coffee bag at the vintage market and cut it up and stapled it around a frame for some art work. Now it's done! Well we actually have one more piece of artwork that I want, but John needs to make it for me. Stay tuned for that one.

Check out coffee bars on Pinterest. Just about EVERY single one has a big monogram letter  as part of the decorating.  Why the need for the letter with coffee bars? Am I missing something? We opted for a clock instead.


So what do you think of the coffee bar? Are you digging the idea?

Wednesday, January 22, 2014

Welcome to THE Cult!

We have been getting asked more and more frequently if we are affiliated with another brand with a similar name. It's time we address it. No we are not in any way shape or form affiliated with another brand.

Back in 2010 when we decided that we were going to take the plunge and start Cult Nails, it took us months to figure out what we wanted to call our brand. We did a lot of brainstorming with friends and family. We then did a lot of research making sure no one had the name or anything close. We worked hard on creating our identity. Created our slogan and hashtags. It took a lot of blood, sweat and tears to make it as far as we have come. Some of those tears involved me curled in a ball on the bathroom floor, but hey, I'm nothing if not passionate about my job! We did this by making a lot of sacrifices to make this dream a reality. It is still a labor of love and takes most of our free time. It's still just John and I plugging away day and night! We also have a group of friends who come in anytime there is a new collection to help.  I don't even need to call and ask for the help half the time, they see a new collection announcement and they text me right away asking when they can help. How cool is that? And when I do call, they drop everything for us.

We have always been pretty open about a lot of how we run our business. We have shared the ups and the downs. So believe me, if we started anything else besides Cult Nails, we would let you know. We would be shouting it from the roof tops or at least excitedly typing it from our keyboards on every avenue of social media that we can!

To have a company come along and try to take our identity has been heartbreaking. We don't know if it was on purpose or not, nor will we speculate. We like to believe everyone has a kind heart and that this was not intentional. But I do know without a shadow of a doubt that we were first. I could say so much more, and I have with close friends. But here in the online world, I think I will just try as hard as I can to hold my head up high, keep working hard to exceed your expectations, and do what I need to do as a business owner to protect our brand identity. I did not want to make a public announcement, but with the number of emails and questions we are receiving, we felt we needed to let you know we are the home of Cult Nails and Cult Nails only.

But while I have your attention, I just wanted to say thank you!  We know that if it wasn't for the support we have received from all of the individuals in the online nail and beauty community, we would not have achieved the level of success we have. We believe that we earned that support by providing a quality product and excellent customer service. We continue to strive to exceed your expectations every day. But even with that, the vocal support from Bloggers, IGers, Twitterers (?), FBers, and everyone else in between has meant the world to us!

With all the amazing options you have for nail polish, the fact that I see the same names ordering today as from day one, warms my heart every time.  I see an order from Sheila or Gail or Alli or Eleanor or Natalie and so many more, and I get giddy and corny and say "Oh hey girl! Thanks for coming back!" even though I know they can't hear me, I figure they can feel it. When we notice a new name, we often put a little "Welcome to the Cult" note in the box. Sometimes it gets a little hectic, but we never stop appreciating our customers. I wonder how many other companies get the awesome words of encouragement, notes just saying hi or a joke or silly instruction like we do? I have had the pleasure of meeting so many people through Cult Nails, some have even become great friends. I love when someone new finds out about our brand. I get to share the experience every time! I love when people interact on social media. I feel like we created more than a brand, but a community of polish lovers that includes so many different types of people. People that I would not necessarily meet in the normal course of life, that I have been blessed with meeting. So any other brand can come along and call themselves whatever they want, I cherish the people I have been able to gain in my life more than the name of our company.  And those friendships aren't going anywhere. In fact, I hope to make many more friendships in 2014, and I hope to meet many more of you this year! I want to have Cult parties and meet other Culties from all over! What I am saying is Thank you to all our supporters! Thank you to all those concerned! Thank you for having our back! Thank you for loving our polish! Thank you for letting me into your life! Thank you for being a Cultie! Thank you for being a friend! (Now I sound like a Golden Girl! LOL!)  Thank you! And for anyone reading this who has yet to join the Cult, Welcome to THE Cult! You don't ever have to buy a polish to be a member of this Cult. We welcome everyone with open arms. And that is really all I can say.

Thank you for joining our Cult! 

Monday, January 20, 2014

Color of the Year - Radiant Orchid, It's Almost Love at First Sight!

Pantone announced Radiant Orchid as the color of the year for 2014. I am a purple fanatic, so I was happy with the selection. That means we can look forward to adding some fun purple touches to everything this year! WAHOO! We are actually have a Feb collection of all purple hued polishes! We figured everyone would be all over the pink and red for Valentine's Day and we wanted something a bit different and it just works out with the color of the year! WAHOO! I know we are in the middle of pre-sale on the Passionate Dream collections and already I'm talking about next month's collection. It just never stops! 

In the meantime, I am so feeling the purple trend and had to bust out Love at First Sight. It is actually pretty close to Radiant Orchid. It is also one of my favorite colors. (I feel like I say that about all my polishes.) Unfortunately this was the World's shortest lived mani! I did my nails in the morning and that evening, my final pre shipment samples of the Passionate Dreams collection arrived and I immediately had to go into testing mode. Oddly I knew the collection was arriving, so I'm not sure why I did my nails. What was I thinking? 


I came across these Kiss Nail stickers and loved the idea of using just one for my accent nail vs. Stamping. Although you all know how much I love a stamped accent nail. 


I cut up a few of the flowers and was going to put just the flowers on all my nails, but after putting on just one, I really liked the effect and left it alone. I'm glad I didn't end up spending more time on this mani, considering how I had to take it off so soon after. 


I love how the color slightly shifts depending on lighting conditions. 


While Love at First Sight is pretty close to Radiant Orchid and we are doing a collection of purples, I'm wondering if I should put out a color in the exact Radiant Purple color? It's almost as if I can't resist just one more purple. hmmmmm….

Friday, January 17, 2014

Milk Paint & Stenciling Fun

You've already seen a pic of the bookshelf I redid. I really wish I had a picture of it before. It was a rustic pine bookshelf. But for reference, it was very similar to this one here. We've had this bookshelf for about 14 years now. I started our with Miss Mustard Seed's Milk Paint in Ironstone. Because the armoire is done is a Shabby Chic style, I wanted to match the book shelf to the look, but I didn't want the distressed edges that is so popular with the look. So I used Miss Mustard Seed's bonding agent with the milk paint and then did 3 coats of Ironstone to get a good solid opaque coverage. I then used the clear wax and white wax to finish it off. But before that fun could happen, I stenciled the back. OMG! What a nightmare! I bought stencil's from Hobby Lobby and then I had to cut them up to get the tops and sides. Absolutely horrible! You're probably thinking, just take the back piece off and then put it back on. But it was not an option for this shelf, you can't take the back our as it is built into the shelf. I have since found stencils from Cutting Edge Stencils that have side and top pieces to make stenciling easier. I already have a project lined up to try their stencils out with and I can't wait! I'll do an actual how to start to finish with those stencils. 

 Here is the book shelf done, without the shelves being put back in. 

 I'm still not sure if this will be the final decorations of the shelf, but so far this is how it looks.

Zero couldn't figure our why I was taking pictures of the bookshelf and not him. 


 A close up of the chevron. You can see there was definitely some room for improvement  on the stenciling. Just focus on the beautiful bowl my mother in law got me for Christmas instead! Cute story there, I found this gorgeous dish in the design of this bowl at TJ Maxx last year. My MIL is always asking what I want for Christmas and I always come up empty handed. So I texted her a picture of the serving dish and told her if she could find the plate, I would take that! So last year I got the serving dish and imagine my surprise to receive a matching bowl this year! How cool is that! (Side note: Is it texted or sent a text to? Damn all this new proper English to learn!)


I also had some stuff to return to TJ Maxx last week and I found my chair for the computer armoire! Told you they had them there all the time.  Now to find an actual comfy big chair for the living room. 

Here is the corner of the living room now. I call it John's office, since the armoire houses his computer and this is where he spends most of his nights when he is working for the Cult after hours. I would just also like to point out that he wrote Passionate Dreams sitting here, so clearly the space is inspirational.


Speaking of Miss Mustard Seed's Milk Paint, this was my first time using the milk paint. And I may have gone overboard, if there is a such thing. But since I am trying to redo the living room and create a more cohesive look, I decided I should also milk pain the end table in the living room using Ironstone as well. I did the bookshelf, end table and the mirror on the shelf all in Ironstone and it took just over one bag of the paint to do it all. I probably could have done it with one bag, but there was a bit of a learning curve going on. Now I feel like I could make a bag last a bit longer. 

I kept the look consistent with the bookshelf by not distressing the end table either. Our coffee table will most likely have a distressed look and I'm undecided on how I will refinish the TV dresser. 

 The basket under the end table houses Zero's toys. We spend our time picking up his toys from the living room floor and he spends his time coming up behind us and taking them all back out again.


Want to see what I did with the mirror? 

Here is the mirror before. It was white and gold. I have had this mirror for probably about 10 years now. It has been on various wall sin various homes, then here with my accessories, and most recently in the garage waiting on a garage sale. I am still trying to figure out how I want to decorate the top of the bookshelf, but I think the mirror was a perfect accent piece, just in the total wrong color.


I spray painted the mirror with silver spray paint. I let it dry to the touch only and then washed most of the silver with Miss Mustard Seed's Milk Paint in Ironstone. I wanted the white wash to blend with the silver and I was hoping for a streaky grey effect with some silver shining through. I wasn't sure if it would work, but I figured, what did I have to lose? I was so excited to see it turning out. I did have to go over some areas with spray paint and milk paint while I was figuring it all out. But I love it!


Once it completely dried, I went into the areas where it was already cracked from it's previous paint job and rubbed in Miss Mustard Seed's White Wax. I left it on for about 5 minutes and then rubbed it in.

 The edges where the detailing is, I barely went over it with the milk paint. I just did some spots so the silver could shine through in other spots.


I am so in love with how everything came out! I can't wait to start on the TV Dresser and coffee table! One of the two is supposed to be our January project, but this weekend Kat has a cheer competition out of town and since I was working on all this well into the first few weeks of January, we are going to tackle on of the two in Feb and the other in March. I may have a few projects in the middle too. 

I know this probably reads like some big Miss Mustard Seed Milk Paint sponsored post. But I bought all the paint and products on my own. I'm pretty sure Miss Mustard Seed doesn't have a shortage of design bloggers willing to review her products. The last place she is probably looking is to some nail, beauty, lifestyle blog that just took the world's longest blogging break. Although if she wants to send me more paint, I would totally use it. Ha!

Although I did just totally stock up on some back ups while at a Vintage Market last weekend, so I can have a lot more fun in my near future! (It's a sickness this milk and chalk painting and house redoing! Pinterest, it's all Pinterest's fault!) 


 Since I have you here, Don't forget to order your pre-sale of the Passionate Dreams collection. You can see swatch pics I took here and read the accompanying story here. Hopefully we will have some blogger photos and reviews to show you soon. We'll let you know as soon as we do!
Newer Posts Older Posts Home