Last Saturday I attended the Book Release party. This event was a formal event for a new book that was created by a local photographer. When his wife was diagnosed with breast cancer, he came up with an idea of photographing women who were in the middle of the fight against breast cancer or survivors. He added bits of advice or the story of each of these women and created a book to give hope to other women diagnosed with breast cancer. You can learn more about the book on their Facebook page . A friend of mine who is a survivor is one of the models featured in the book, so of course I was going to get dolled up to celebrate the fact that she kicked breast cancer's ass and her modeling in this amazing book! I am so proud of her.

Due to a wardrobe issue, where the formal dress I rented made me look about 15 lbs heavier and boxy as hell because it was too big, I had to figure something out at the last minute! I ended up wearing a Target dress with gold accents, and besides my Devious Nature mani, I had no pink on, so I thought about a pink eyeshadow look. But pink eyeshadow and me do not get along, so I thought perhaps I could do a pink smokey eye and use some colors close to pink that work with my skin tone that would still give an overall pink effect. Several Youtube video's later, I thought I could pull this off. Mixing different techniques and ideas from these makeup mavens, I came up with something that I think ended up working out quite nicely. I keep getting asked about how I did the look, so I figured why not attempt a tutorial post on it.


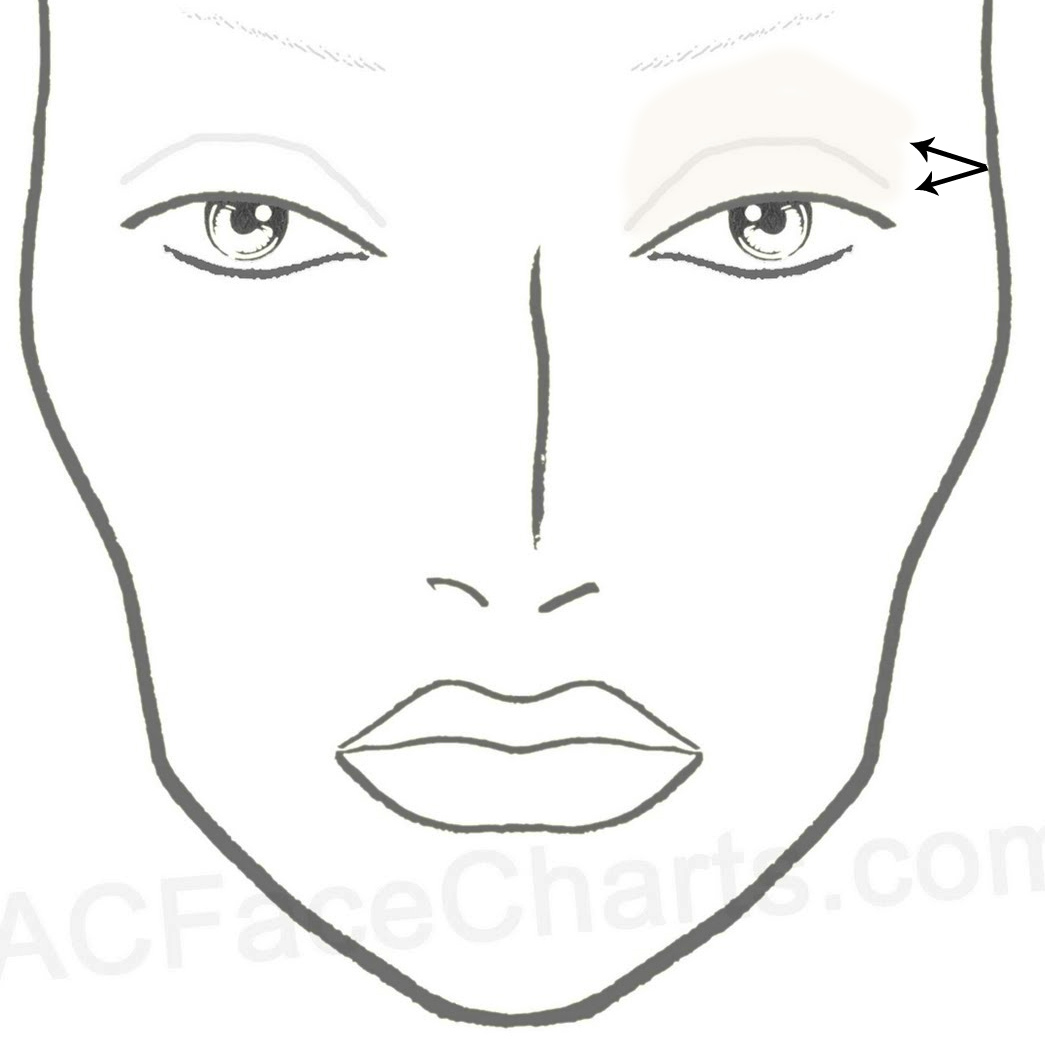
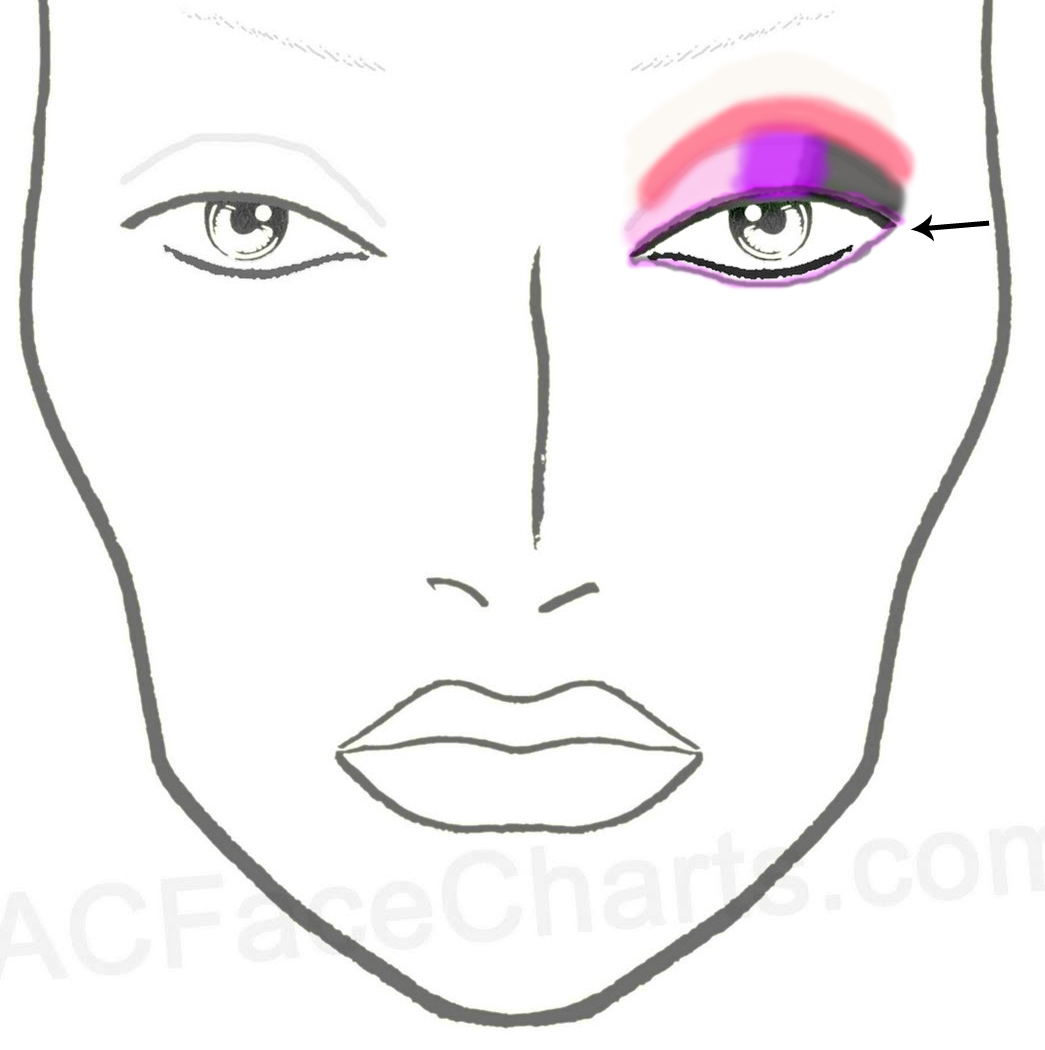
I preface this by saying, I am not a makeup guru, maven, or artist. The steps on the face chart below are not even close to professional! I just highlighted the areas so you could see where I applied what. With that being said, here we go...
Step 1: I primed my eyelids up to the brow bone with Urban Decay eyeshadow primer in Original. I was a bit nervous about this since any time I have used this in the past, I ended up with the primer settling into the fine lines in my eyes. But one Youtuber said let it sit a minute. AHA! So that's what I am doing wrong! I always applied and then immediately moved on to applying my shadow. So this time, I applied it and then got my supplies together and after it was dry I moved on. What a difference that made!
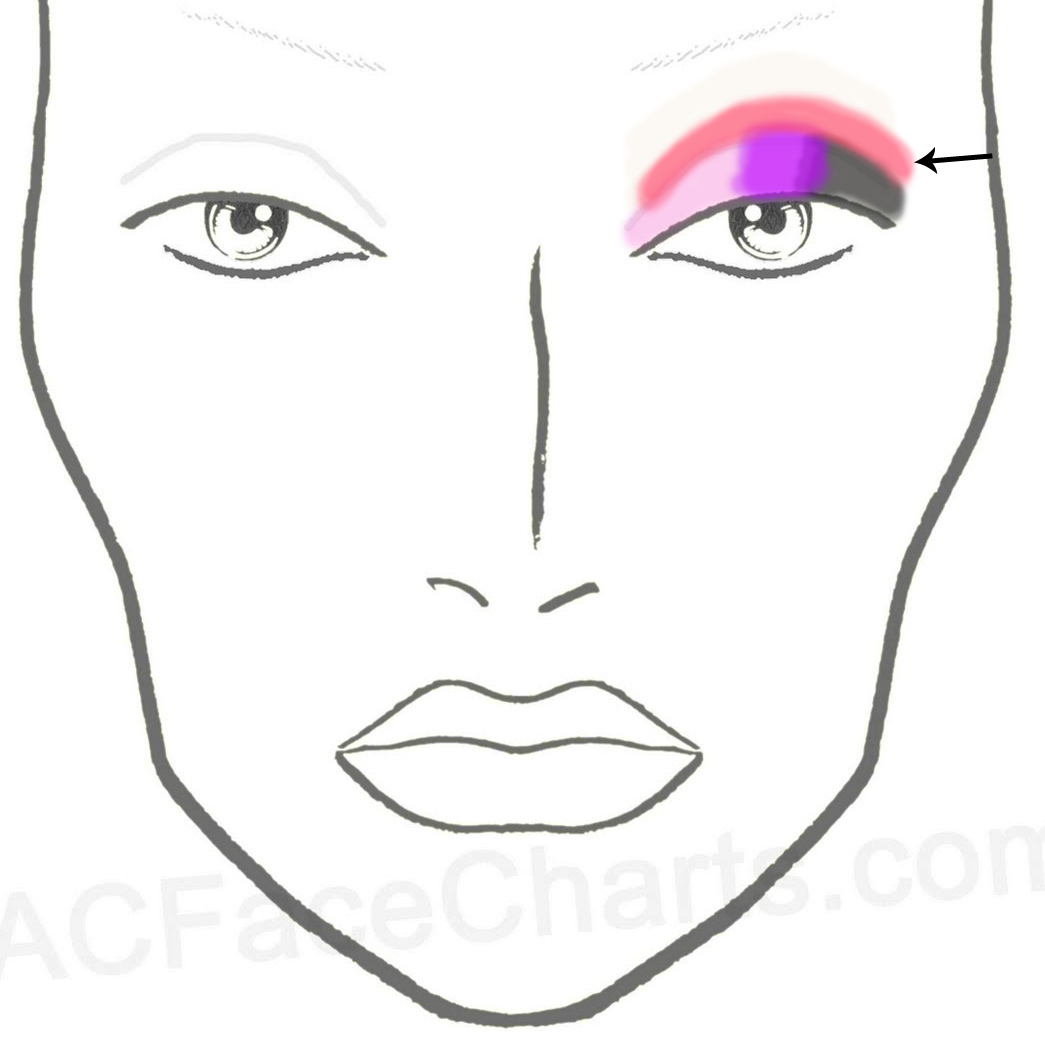
Step 2: I applied a hot pink eye shadow on just the lid of my eye up to the crease.

In case you care, I used the hot pink eyeshadow in the Wet N Wild Eye Shadow Trio in Spoiled Brat pictured here. I applied it using the base shadow brush in the Real Techniques Eyes Starter Set.

Step 3: I applied a pure black matte eyeshadow in a V shape to the outer 1/3 of my lid. The V shape I did following the shape of my eye at a slight angle to enhance the cat eye look a bit. I used Urban Decay Black Out. (If there is one eyeshadow you should have in a full size it is a good matte black. Regardless of brand, it truly is the most versatile eye shadow you will ever own. IMO) The picture below is for illustration only. I tap on the eyeshadow in this area with a crease brush, it makes it easier for me to apply accurately as the crease brush is a bit smaller. Then I grab a blending brush (I use the MAC 217 blending brush for blending) and blend the black into the pink and back and forth until they are blended nicely, but don't go more than to the middle of your eye lid while blending and try to keep it below the crease. I have to say at this point, I thought this look was going to be a fail, it looked so intense, I almost took it off and scrapped the idea, but decided to just finish it to see what would happen.

Step 4: Using a base shadow brush I applied a purple/pink to the middle third of my eye lid. and then I grabbed the same blending brush and blended it into the black shadow on one side and the pink shadow on the other. for this one I used one side of the brush that came with my Urban Decay Naked Palette, but the brush can be purchased separately on UrbanDecay.com. (Note: when applying the base colors, I use clean brushes, so you need to have about 3 or 4 base brushes and maybe 2 blending brushes.)

Step 5: I used a maroon color and applied it to my crease using the other side of my Urban Decay brush that I just used for the purple/pink above. And then I grabbed the same blending brush I had been using and blended it all in.
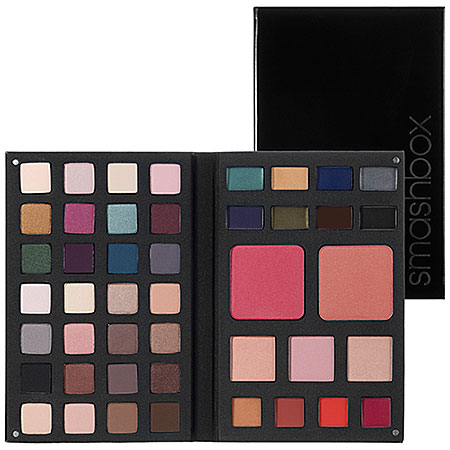
For the purple/pink and maroon eyeshadow I used the Smashbox Master Class palette pictured here. The purple/pink is the 2nd color on the left of the second row and the maroon color is the last shadow in the 2nd row.
Step 6: I combined the purple/pink color and maroon color and lightly lined all around my eye using the eyeliner brush in the Real Techniques Eyes Starter Set.

Step 7 Using the same liner brush, I lined around my eyes with MAC Paint Pot in Blackground. Then I used the same brush again and lined a bit to blend it out with a combo of the purple/pink mixed with the black eyeshadow.
Step 8: Using an almost white eyeshadow, I highlighted the inner corner of my eye and just under the eyebrow on my brow bone. I used the deluxe crease brush in the Real Techniques Eyes Starter Set and Urban Decay Walk of Shame Eye Shadow. I then grabbed my original shadow base brush and dipped it in the Wet N Wild hot pink and touched up any areas I felt needed a bit more pink and on top of the maroon crease and then grabbed my blending brush and blended some more. (phew! lots of blending!) I applied false lashes, a bit more black eyeshadow wear the false lashes meet my eyelid. A touch of mascara on my real lashes to blend them into the false lashes and some mascara to my bottom lashes.

And finally, I am done! PHEW! Here is the final look.
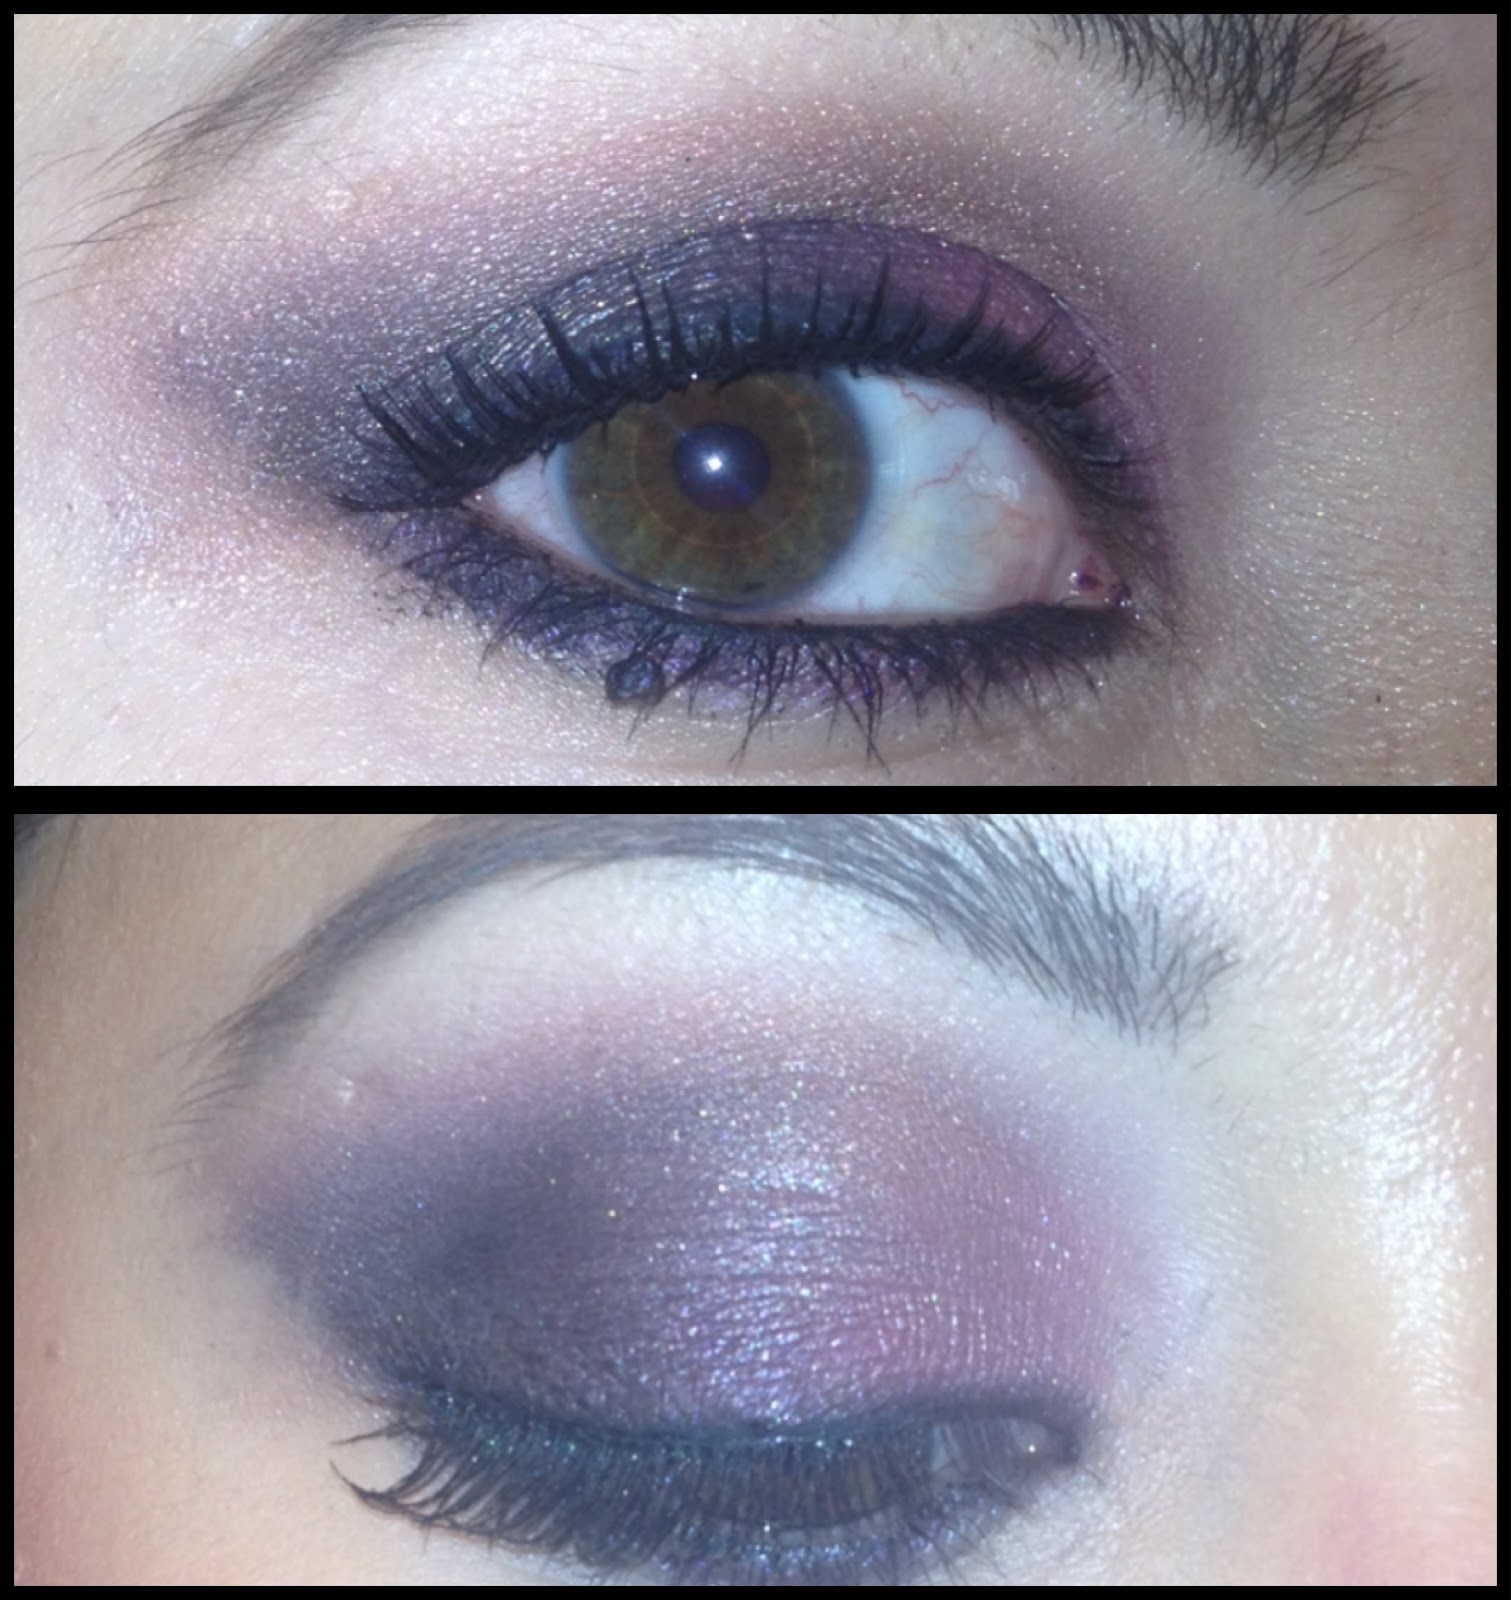
I hope I explained this well. I was trying to explain it how I would want it explained to me. I have to say I really like the way this came out. I actually didn't want to wash it off at the end of the night. Which means I need more night outings so I can play with some dramatic eye looks more often! I am almost tempted to do a video tutorial on this. What do you think? Was this tutorial too much info? Too little? Would you like to see me take a stab at doing this on video?
Tks Maria
ReplyI love the color combo you did here and I'm totally going to try it...I think this tutorial was great!
ReplyYou are so chic, Maria! I would never have guessed that dress was from Target. I love the way you styled it.
ReplyI absolutely love this tutorial often tutorials on eye make up are completely beginner unfriendly but this was lovely as I honestly feel I could try and recreate this myself! You look absolutely stunning Maria! And I especially love your shoes! On another note, your skin always looks completely flawless and your eyebrows are immaculate! (hope that doesnt sound stalkeresque!) I would love to know what primer and foundation you use and what you use on your brows.. I use UD brow box in brown sugar but find it a bit of a hit and miss so I would love to hear about your make u regime. Sorry for asking so much of you!
ReplyMuch love <3 x
I LOVE the way you tutorial-ed this. The cartoon graphic combined with the paragraph for each and the basic color names instead of branded names is a huge help! The brush links were terrific too. I know tutorials like this can be a huge time consumer though so thank you!
ReplyYou so do not look boxy! Great dress, and eye look:) I'm going to follow
ReplyThanks for the tutorial. It was super easy to understand! By the way you look amazing, and those shoes!!!!!!! Those are the most amazing shoes........I want them !
Replygorgeous!
ReplyLove it. Yes a video pls. I love watching make up tutorials - it's the only way I have any idea as to how to apply eye shadow:)
Reply